Chicken Coop Ventilation: 5 Rules for a Dry, Healthy Flock
At dawn, a 4-by-8-foot coop gives you a useful starting number: about 3.2 square feet of clear ventilation opening for 32 square feet of floor. The five rules below show where that opening belongs, how to read moisture, and what to change when winter wind or summer heat arrives. The goal isn’t a sealed, warm box. It’s a dry roost with air moving above your birds, not through them.
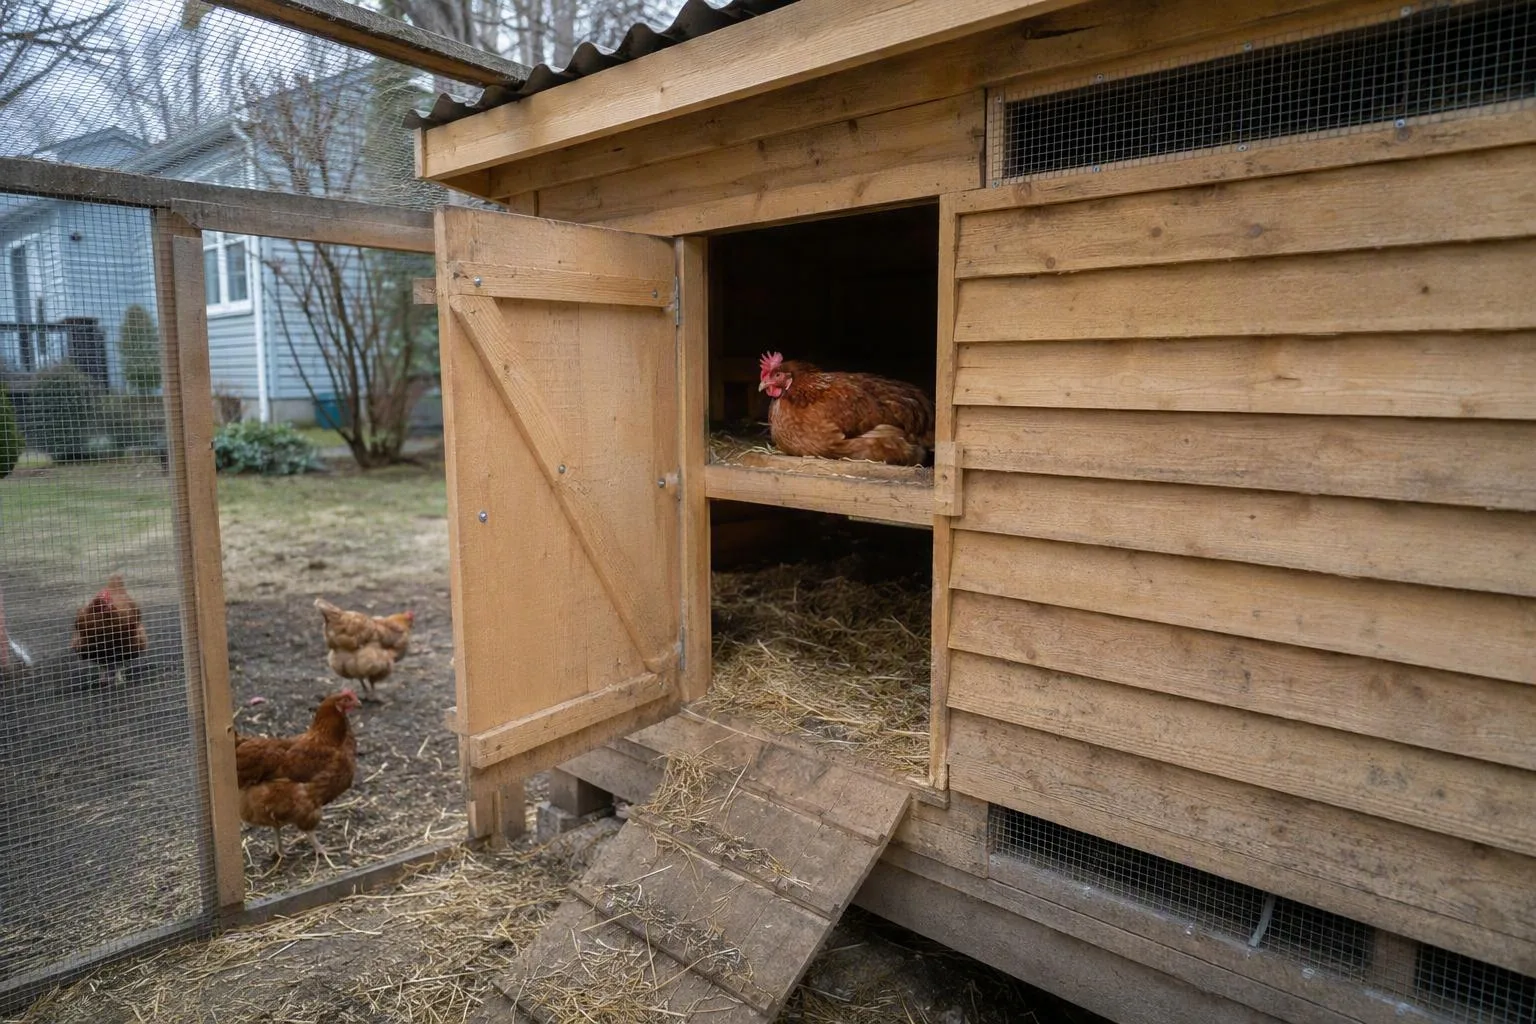
Rule 1 — Start with floor area: the 1:10 vent calculation
Use 1 square foot of usable ventilation opening per 10 square feet of coop floor as a planning starting point. I treat that as a practical house rule, not a universal building code or a promise that every coop will behave the same way.
Measure the opening your birds actually get. Count the clear area inside the frame after wall studs, trim, shutters, and fixed baffles have taken their share. Don’t count an entire window because the label says it is large. A closed shutter contributes nothing, and a vent blocked with dust or cobwebs has less useful area than it had on installation day.
For a 4-by-8-foot coop, the floor area is 32 square feet. Divide 32 by 10 and you get 3.2 square feet of total usable opening. That is the combined area of high exhaust and protected intake. It isn’t 3.2 square feet on every wall, and it isn’t a target based on the number of windows.
The same calculation gives 3.2 square feet whether you keep three hens or twelve in that building. The flock size still matters. Twelve birds add more exhaled moisture, manure, body heat, and movement through the same air volume. If you’re using the full floor area for a dozen birds, increase the clear opening where weather allows, improve the litter system, or reduce the flock. A ratio based only on floor area can’t erase crowding.
Hot, humid weather is another reason to move upward from the starting point. So is a coop with solid walls, a low ceiling, or limited cross-flow. In a dry, breezy climate, the starting calculation may be generous. In a damp climate, it may be the minimum I’d design around. If you can’t make enough opening without exposing the roost to rain or predators, change the layout rather than simply cutting a bigger hole beside the birds.
Rule 2 — High exhaust, protected intake: make airflow miss the roost
Vent placement does the real work. Put exhaust openings at the eaves or high on a gable, above the roost. Let replacement air enter through a lower opening or an opposite wall, where it can mix before reaching the birds. As your birds breathe and bedding gives off moisture, warm damp air tends to rise. A high outlet gives that moisture a route out.
A useful air exchange is not the same thing as a cold stream across sleeping birds. A low opening aimed straight at the perch can make the roost uncomfortable even while the upper part of the coop is ventilating well. Your hand should feel the difference. At roost height, you want still or gently changing air. A fast, steady ribbon of cold air means the intake needs redirecting, shielding, or moving.
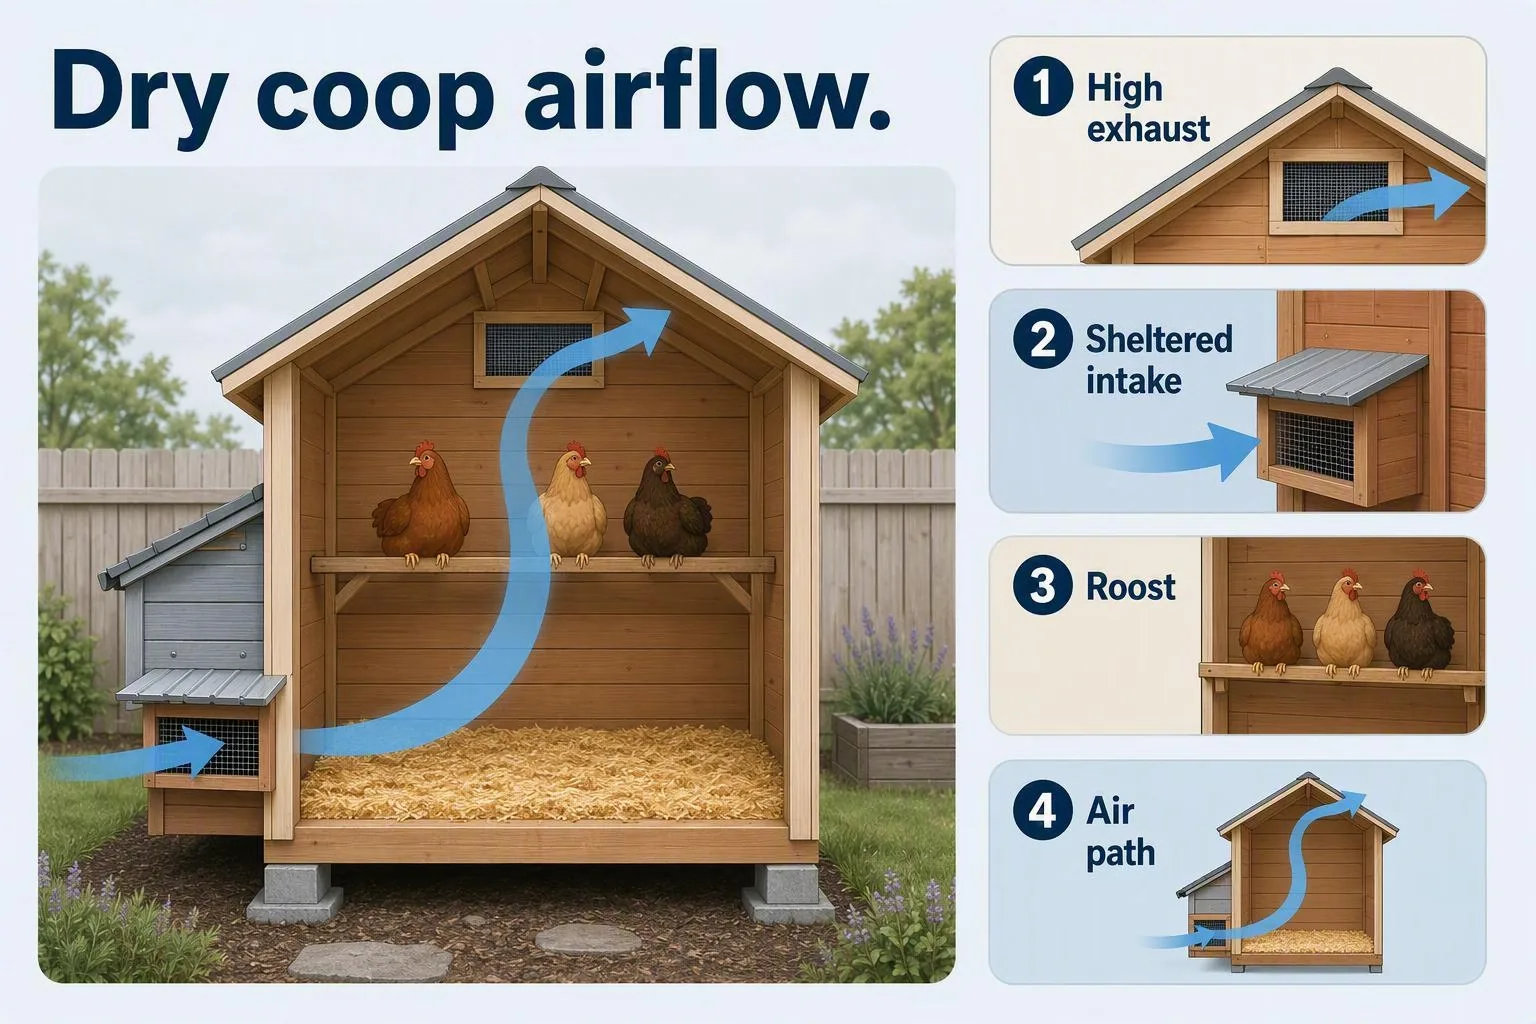
Cover ventilation openings with securely fastened hardware cloth. I use 1/2-inch mesh as the normal starting specification for a small backyard coop. Where mice or small snakes are a particular concern, 1/4-inch mesh may be the better fit, although it can collect dust faster and needs more frequent checking. The screen is part of your chicken coop predator protection plan, not an optional finish.
I find several smaller openings easier to control than one large hole. You can baffle one opening, close a windward section, or leave a sheltered section open while keeping another section clear. One huge opening gives you fewer ways to respond when the wind changes. That’s a judgment call, but it matters in an ordinary backyard where you’re adjusting the coop by hand instead of with powered fans.
My low-tech check is a bare-hand test. I stand inside the coop after sunset, put my hand at roost height, and leave the high vents in their normal position. In a small backyard setup, I once found the upper air moving gently while a windward low opening sent a cold ribbon straight across the perch. I didn’t close the exhaust. I added a simple exterior baffle to the low opening and repeated the test after the weather shifted; the direct stream was gone, but the upper outlet still had a path to the outside. That’s the distinction you want: air exchange above your birds, not a breeze on their backs.
Give every high opening a roof overhang, hood, or baffle if prevailing rain can drive into it. A vent that works in dry weather can become a wet bedding problem during a sideways storm. Keep the air path open, but make the path turn before rain reaches the roost.
Rule 3 — Read the morning evidence: 50–70% humidity, condensation, and wet litter
Humidity is useful as a clue, not as a verdict. My practical working target is roughly 50–70% relative humidity at roost height. Sustained readings around 70% or higher, water droplets on the walls, frost on the inside of the roof, wet bedding, or an ammonia smell all tell you to investigate how moisture is entering and leaving.
Put a low-cost hygrometer at roost height, away from the drinker and not touching an outside wall. Don’t hang it directly beside an intake or exhaust opening. You’re trying to learn what your birds experience, not what the incoming air says. Check it before sunrise or as soon as you open the coop. Overnight, the birds have been breathing in a closed space, so dawn gives you a more revealing reading than the middle of a dry afternoon.
Then look for the source before adding another vent. A leaking drinker can wet litter faster than a correctly sized opening can dry it. Clumped bedding under the roost points toward manure management. A damp corner beside a wall may be rain penetration. If the walls are dry but the coop smells strongly of ammonia, remove wet litter and inspect manure accumulation before assuming the opening area is the whole problem. Opening a vent won’t fix a drinker that drips all night.
There is a firm boundary here. Coughing, nasal discharge, a swollen face, or open-mouth breathing needs veterinary guidance rather than ventilation changes alone. Heat can cause panting, but breathing difficulty in cool conditions deserves more caution. I’d keep the Merck Veterinary Manual near your coop notes as a veterinary reference, then call a poultry veterinarian or local extension office if signs persist, affect more than one bird, or come with poor appetite or marked weakness.
Rule 4 — Cold snap or heat wave? Change the openings, not the dry-air goal
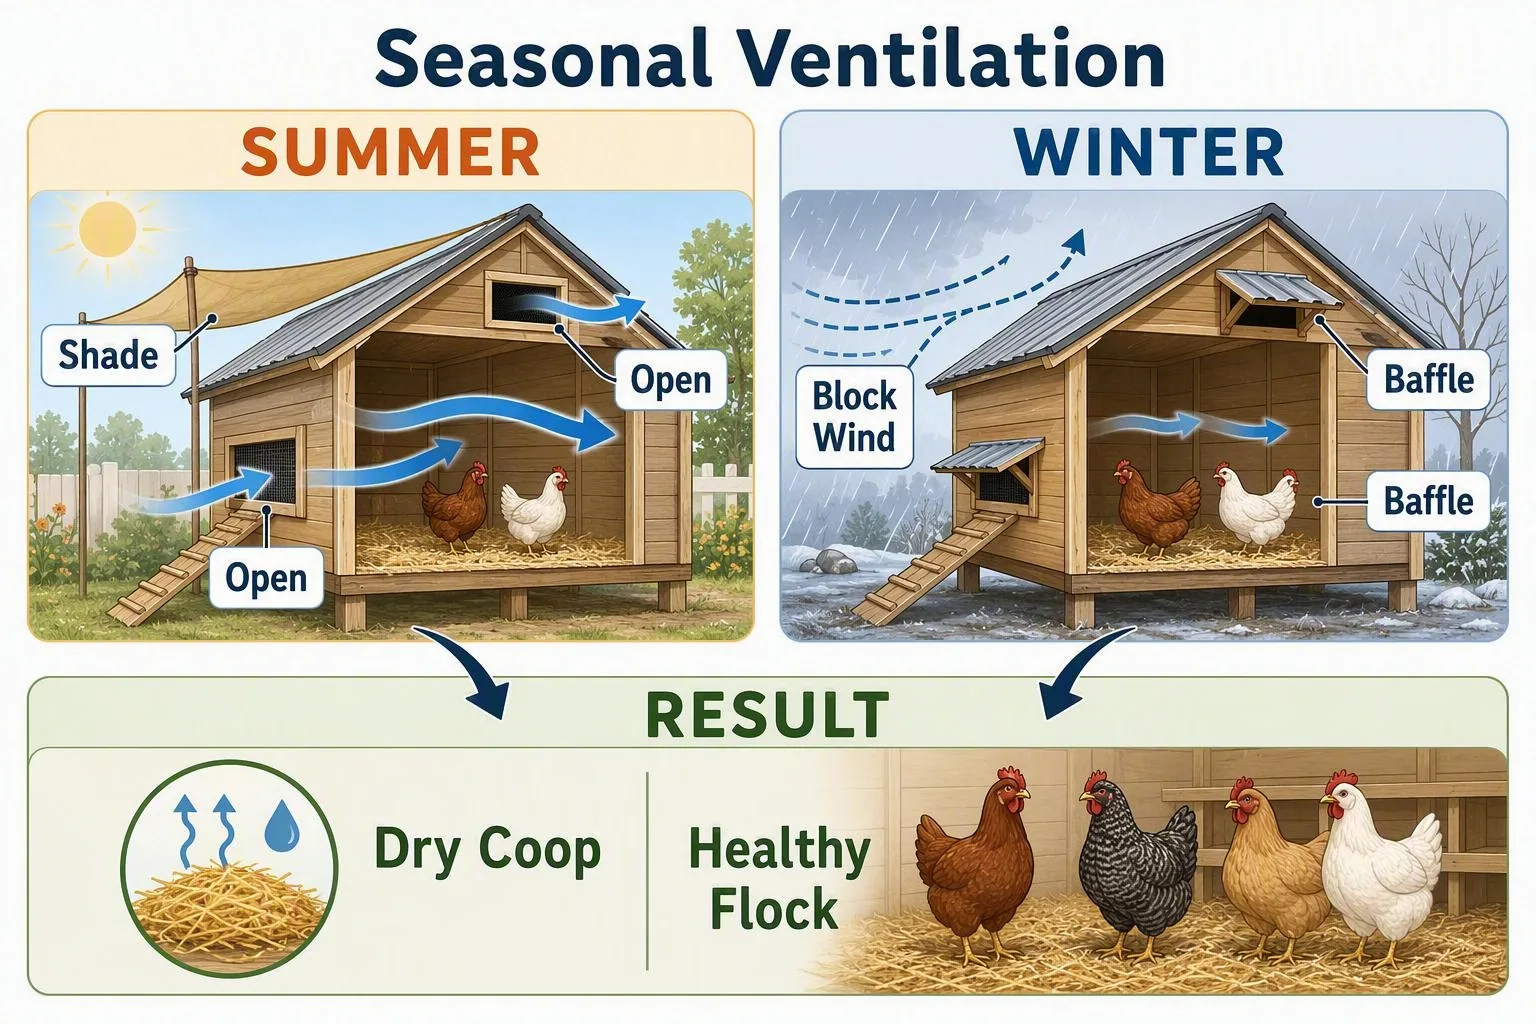
Use a seasonal decision path instead of a single winter setting. Start with the same question in every season: is moisture leaving, and is moving air reaching the roost?
During a cold snap, even outdoor temperatures around 32°F/0°C or below do not automatically justify sealing every vent. Keep high-level ventilation open around the clock if it is dry and protected from wind-driven weather. If snow, rain, or a windward lower opening sends air directly across the perch, baffle that opening or reduce it temporarily while preserving another intake route. A cold coop can still be dry. A warmer coop filled with damp air is a poor trade.
My judgment is to protect your birds from direct moving, wet air rather than trying to hold a particular indoor temperature. That decision belongs beside the question do chickens need heat in winter. A heater may add fire, wiring, and acclimation concerns; it also doesn’t remove moisture. Fix the air path and litter first, then make any heat decision with the bird’s age, health, and the heater’s safety in mind.
During hot weather, open every predator-secured window, door, and screened side that your coop design allows. Add shade and keep plentiful clean water available. Ventilation moves hot air, but it doesn’t create shade or water. If your birds are panting, holding their wings away from their bodies, standing rather than settling, or seeking the coolest floor area, treat the coop as too hot and act promptly. The article keeping chickens cool in hot weather belongs on the same summer checklist.
The National Weather Service heat-index guidance is useful for reading hot, humid conditions because a heat index combines air temperature with relative humidity. It is a people-oriented measure, so it can’t replace watching your birds. A chicken that is panting in shade with water still needs your attention even if the weather number looks manageable.
Rule 5 — A vent is not finished until it is screened, rain-safe, and tested
Finish the vent as if a curious raccoon will inspect every edge. Fasten 1/2-inch hardware cloth tightly over each opening. Use screws and washers or another attachment that won’t pull through the mesh. Run your fingers around the frame. If you can lift a corner, a predator may be able to lift it too. Chicken wire can keep hens in, but I wouldn’t give it the predator-barrier job. Your wider chicken coop predator protection plan still needs secure doors, latches, and run fencing.
Before birds move in, test the empty coop for 24 hours with the vents in their normal positions. Visit once in the evening and again at dawn. Look at the litter. Feel the air at roost height. Check the hygrometer if you have one. Test after rain if possible, because a dry-weather inspection won’t reveal a vent that funnels water inside.
| What you find | Where I’d look first | First correction |
|---|---|---|
| High humidity with no noticeable airflow | Blocked or undersized exhaust | Clear the opening, then add protected high area |
| A cold stream across the roost | Low intake aimed at the perch | Baffle, redirect, or move that intake |
| Rain inside below a vent | No overhang or wind baffle | Shelter the opening without sealing the air path |
| Odor with dry walls | Manure or litter management | Remove wet clumps and inspect the roost area |
For the first week, make the dawn check daily. Once the coop is behaving, inspect vents, mesh, fasteners, and baffles weekly. Recheck after adding birds, moving a roost, changing litter depth, or closing a side for winter. A new perch position can put the same airflow directly across sleeping birds.
Save this simple line: a dry coop is not a sealed coop; it is a coop where air has a safe route out and rain has no easy route in. That is the useful test behind all five rules.
Your next action this week is practical: measure the inside floor, calculate your starting clear vent area, and mark high exhaust and protected intake locations before cutting anything. Then stand at roost height and test the air path with your hand. After the coop is weather-tight, use how much feed per chicken per day to check the running cost of the flock you’re planning.