Raising Baby Chicks and Ducks Together: 5 Rules for a Dry Brooder
Six same-age babies can turn a 3-square-foot tote into two different climates. Chicks need a dry floor; ducklings treat water as part of eating. Yes, raising baby chicks and ducks together can work, but only if your brooder gives ducklings bill-deep drinking water without making chicks sleep in wet litter.
Use the same-age, same-size test first. Then build five things around it: a warm-to-cool gradient, contained water, feed that covers the ducklings, absorbent bedding, and a spare space for separation. That last item isn't over-planning. It is what lets you correct a problem before a small bird gets pushed away from heat, feed, or water.
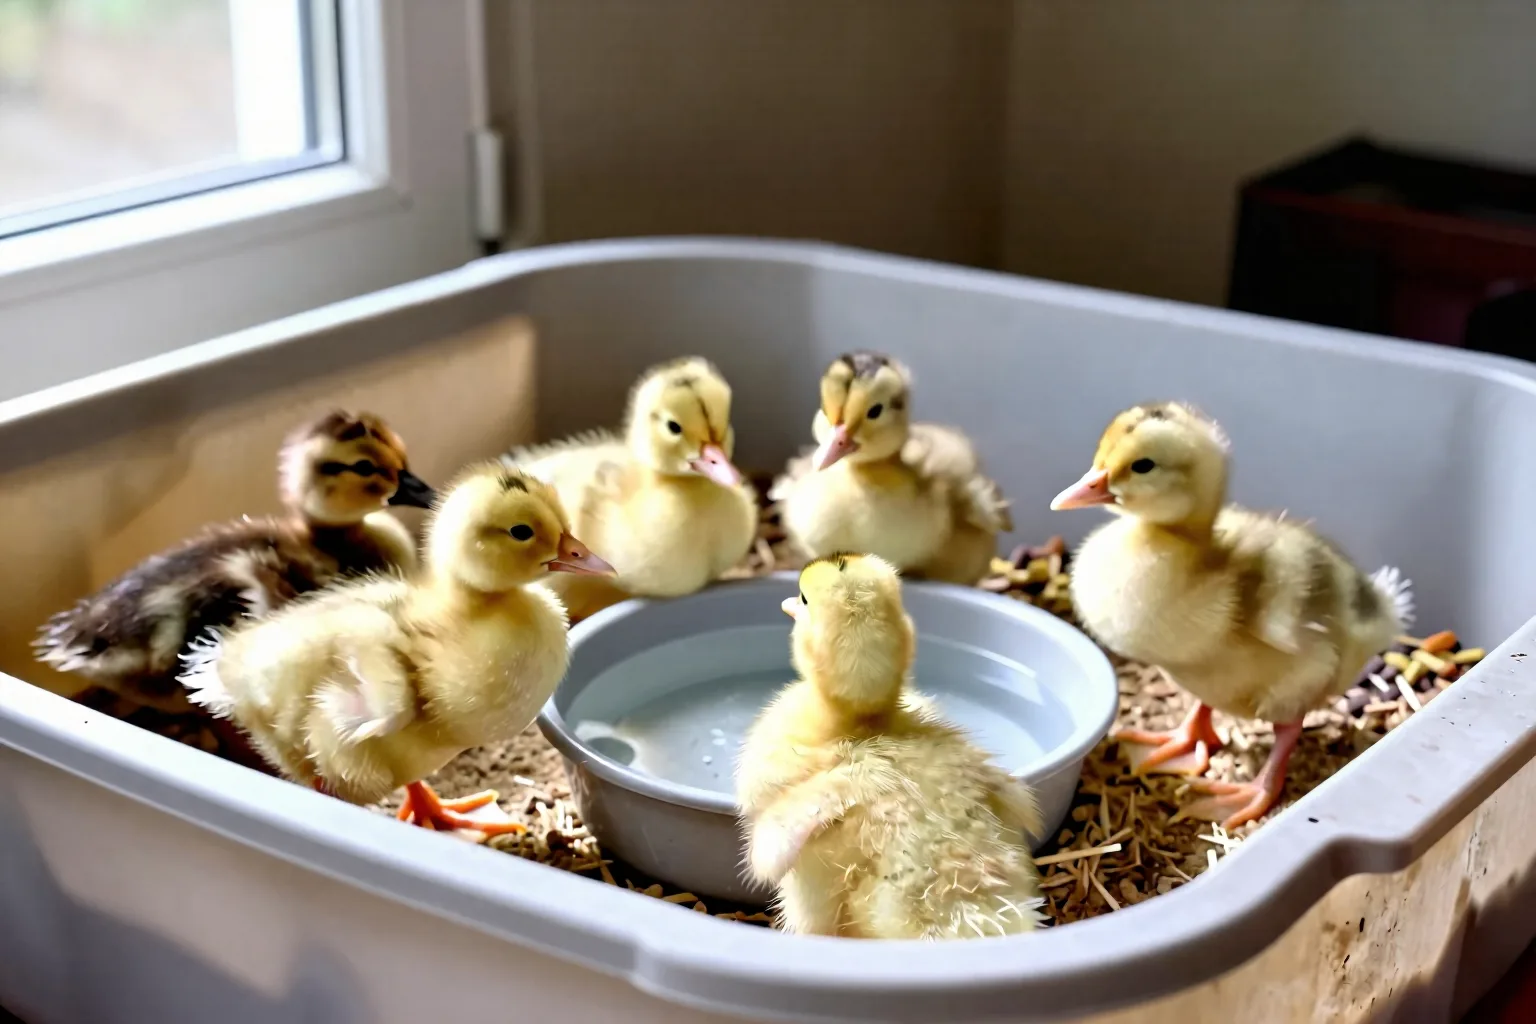
Yes—but only with a same-age group and a wet-zone plan
Chicks and ducklings together are most manageable when they arrive in roughly the same age window and are close in body size. They need enough floor space to move away from the heat and from one another. A brooder that works for three tiny chicks may become cramped quickly once three fast-growing ducklings start splashing, shoving, and sleeping in the drinker tray.
Think of the setup as five non-negotiables:
- same-age, similar-size babies;
- a heat gradient rather than one hot box;
- water deep enough for a duckling to dip its bill, but not to climb into;
- a starter ration suitable for both species; and
- dry, non-slip bedding with a spare brooder or divider ready.
Keep birds from unrelated sources apart at first. Use separate equipment and sensible hand-washing and observation practices, following local veterinary guidance. The USDA APHIS backyard poultry biosecurity guidance is a useful reference point for thinking through new-bird separation. A bird with respiratory trouble, persistent diarrhea, poor mobility, or unexplained lethargy belongs in a sick-bird space, not in the middle of a mixed brooder.
Rule 1: Put same-age, similar-size babies together
The go/no-go test is simple. Combine birds only when they are from the same general hatch or arrival window, can stand and walk normally, and are close enough in size that one cannot routinely block another from the feeder or drinker.
Don't judge by hatch date alone. A small, weak chick and a vigorous duckling of the same age may have very different practical needs. The duckling doesn't need to be aggressive for the pairing to go wrong. A normal step, shoulder bump, or scramble toward the warm side can knock a smaller chick aside. Size mismatch makes ordinary brooder traffic more consequential.
Watch the first meeting instead of leaving the birds together and checking later. Look for repeated pecking, cornering, climbing over one bird to reach the heat, or a chick that stays still while the others move around it. A short inspection after feeding and again after the group settles can show whether each bird is reaching food, water, and warmth.
A brooder divider is the practical answer when the birds are healthy but sizes are drifting apart. Use mesh or a solid divider that prevents pecking through gaps and leaves each side with its own heat access, food, and water. You can remove it for supervised visits later. A second tote is better if one side becomes wet or a bird needs closer observation.
Separate any bird showing nasal discharge, open-mouth breathing, marked weakness, repeated falls, a swollen joint, or persistent loose droppings. Those signs can have several causes. Home separation protects the rest of your birds while you contact a poultry veterinarian or local extension office for advice.
Rule 2: Build a heat gradient, not a hot box
Use about 90–95°F (32–35°C) at baby-bird height on the warm side during week one as a working starting point. That is a warm-side target, not a command to make every inch of the brooder that temperature. Your birds need a cooler edge so they can regulate their comfort by moving.
Reduce the warm-side target by roughly 5°F each week, then let behavior confirm or challenge the setting. A tight, noisy huddle under the heat suggests chilling. Birds pressed against the far wall, panting, or holding their wings away from their bodies suggest overheating. A comfortable group feeds, wanders, and rests in loose clusters instead of piling up or avoiding the heat completely.
Measure at the height of the chicks' and ducklings' backs. A thermometer hanging near the lid can read a very different temperature from the floor. Check the warm side after changing the heat source, adding bedding, moving the brooder, or changing the room temperature. For a week-by-week reference, see Chick brooder temperature by week.
For planning, allow about 0.5 square feet per bird during the first two to four weeks, then work toward about 1 square foot per bird as the group approaches four to six weeks. Treat those figures as a starting floor, not a maximum. Large breeds, fast-growing ducklings, warm weather, and a water area that makes part of the floor unusable all call for earlier expansion.
For six babies, that means beginning with about 3 square feet, such as a 2-by-1.5-foot footprint, then moving toward 6 square feet as they grow. A radiant brooder panel can provide a defined warm edge. A heat lamp can also work, but it needs a secure fixture, protected wiring, clearance from bedding, and a setup that cannot be knocked down. Test the brooder at floor level before the birds arrive.
Rule 3: Give ducklings bill-deep water in a contained wet zone
Water should be available whenever feed is available. Ducklings need to dip their bills while eating and drinking. They do not need a bathing tub in the brooder. The goal is a drinker that lets a duckling wet its bill while keeping its body and down out of the water.
Use a stable, low-sided drinker that a chick can reach but cannot climb into. Set it inside a splash-catching tray. Put the tray on a solid, textured, non-slip platform rather than on loose bedding. A heavy plastic base or a rubber mat with a grippy surface is more useful than a tall stand that creates a fall or a gap.
Keep the water zone away from the sleeping area and off the main warm spot. It still needs to be easy for the smallest chick to reach. A good arrangement has three visible areas: warm space, dry bedding space, and a removable water tray. The water tray should come out without dismantling the whole brooder.
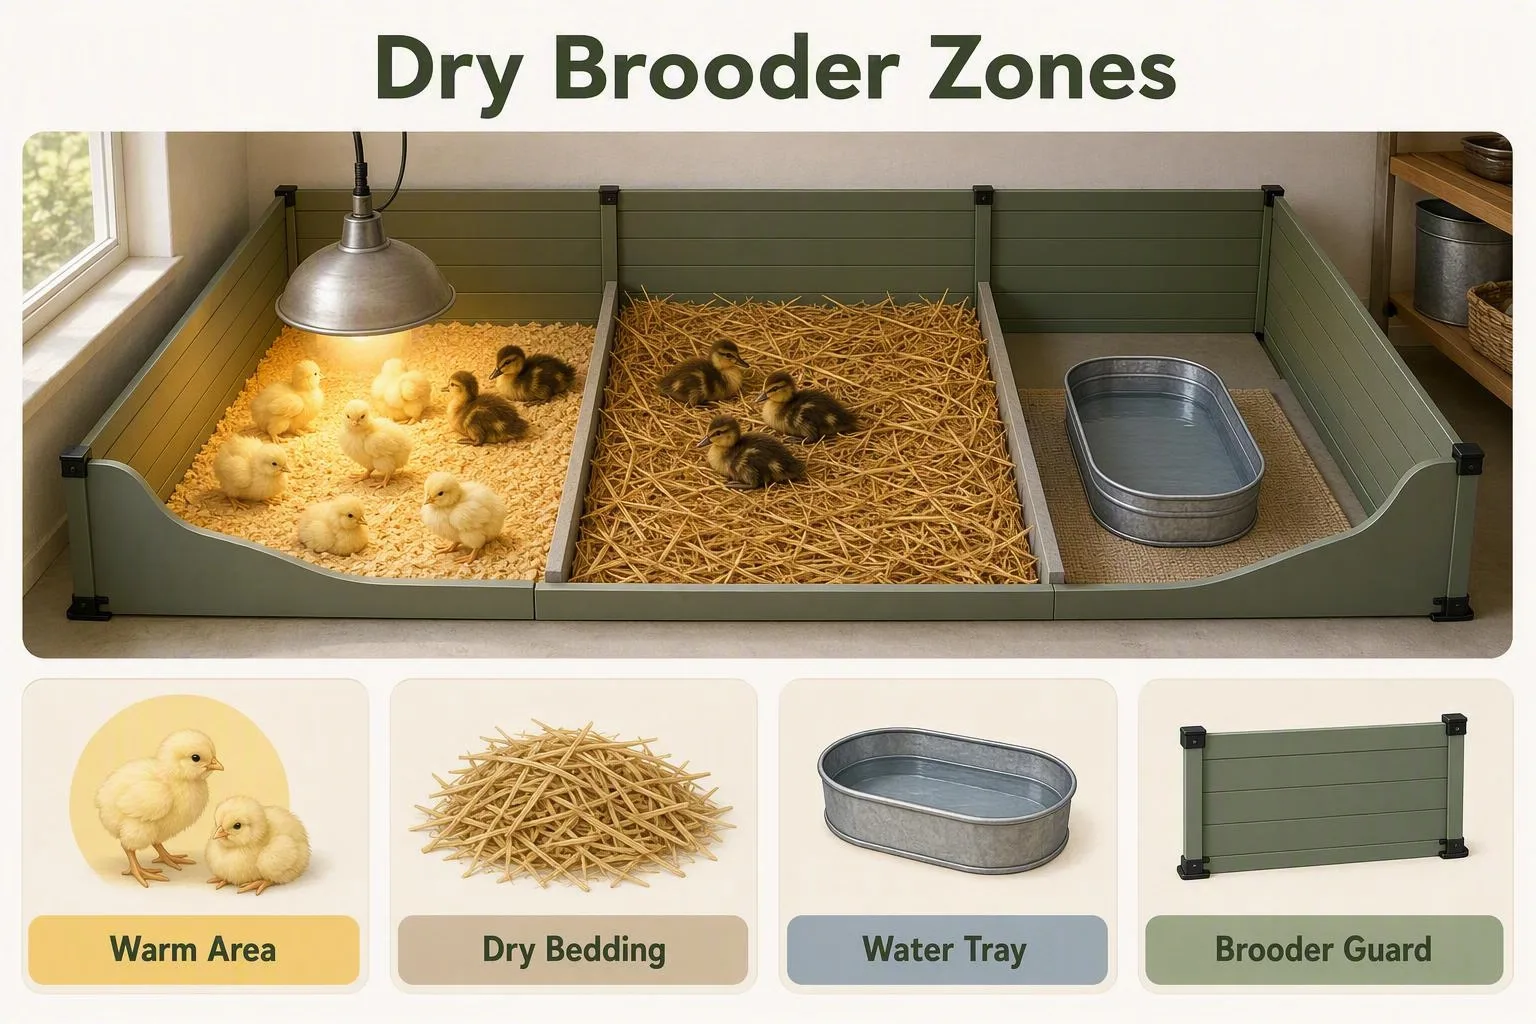
Open bowls and bathing tubs create several avoidable problems. A bird can climb in, soak its down, chill as it dries, or become trapped against the side. Ducklings also splash while drinking. That splash can travel under bedding, leaving a damp layer that looks dry on top.
While the babies are awake, check the water zone every few hours. For a small mixed group, cleaning or refilling at least two to four times daily is a useful starting routine. Increase that attention in warm weather, with more ducklings, or whenever the tray is visibly dirty. A waterer that stays clean for one morning may need attention every hour once the birds grow more active.
Don't solve repeated spills by raising the drinker beyond the smallest bird's reach. Solve them with containment and placement. If a chick has to cross a soaked patch to drink, the water station is badly designed even if the drinker itself is clean.
Rule 4: Feed for the ducklings' niacin needs without short-changing chicks
Don't assume that a bag labeled chick starter is automatically a complete diet for ducklings. Ducklings and chicks do not have identical nutrient targets, so the feed label matters more than the word starter on the front of the bag.
The simplest choice is a starter explicitly labeled for chicks and ducks. An all-flock starter may also fit a mixed group if its label includes growing waterfowl and gives suitable feeding directions. If the labels do not match, separate feeders or separate brooders are safer than trying to balance the ration with kitchen ingredients.
Ducklings' higher niacin need is the reason this decision matters. Poor nutrition can show up as weak legs, difficulty walking, or trouble standing, although those signs can also come from injury, slippery flooring, infection, or other nutritional problems. Compare the guaranteed analysis and directions with a veterinary nutrition reference on niacin requirements. If you need a supplement, use the product label and advice from an avian veterinarian or local extension office. Don't invent a dose from a recipe meant for another product.
Be cautious with medicated chick starter. Read the active ingredient, species directions, and warnings on the exact bag. A product suitable for chicks is not automatically the right choice for ducklings. Keep feed dry and easy to reach. For six babies, two small feeding points can reduce blocking better than one large feeder placed in a corner.
Wait on treats until the babies are established on the correct starter. Treats dilute the ration and can make it harder to see whether a feed problem is improving. Clean starter, fresh water, and an accessible feeder give you a clearer baseline.
Rule 5: Make wet bedding the first chore, not an afterthought
Use a solid, non-slip floor with absorbent bedding. In a small dry-bedding brooder, roughly 2–4 inches is enough to absorb ordinary splashes without wicking straight through to the floor. That is an owned rule of thumb, not a fixed requirement. Add or replace bedding when wet patches reach the base, rather than simply building a deep mound around the drinker.
Appropriate pine shavings are a practical choice for many brooders. Slick newspaper can make young legs slide. Fine sawdust is commonly avoided because loose dust is easily stirred into eyes and airways. Cedar shavings are also commonly avoided in enclosed brooders for their aromatic oils and dust. The useful distinction is between clean, absorbent flakes and material that becomes airborne or slippery when wet.
Ducklings make this chore heavier because bill-dipping transfers water from the drinker to their bills, feathers, feet, and bedding. Inspect the floor at least morning and evening. Remove wet clumps and soaked patches as soon as you see them. Replace more of the bedding when it smells of ammonia, feels damp, sticks to feet, or soils vents.
One chick with a pasted vent is a local problem. A whole brooder with damp litter, dirty vents, and a strong smell is a setup problem. Soften a small stuck patch with warm water rather than pulling at it. Repeated pasting, weakness, or diarrhea calls for veterinary advice instead of endless bedding changes. Keep ventilation above the birds, but block drafts at floor level.
The daily split test: when to separate them or move outdoors
A mixed brooder earns another day together when your birds are active, feeding, drinking, dry underneath, and resting in loose groups. Even distribution matters. You should see birds using the warm side, the cooler side, and the dry feeding area rather than one dense pile or one isolated bird.
Separate promptly if you see repeated bullying, blocked access to feed or water, a widening size gap, wet or chilled chicks, limping, inability to stand, breathing difficulty, persistent diarrhea, or several birds becoming unwell. Separation is not a verdict on the whole setup. It is a way to turn one crowded problem into two manageable spaces. A bird that cannot stand, struggles to breathe, or declines despite warmth and access to water needs a poultry veterinarian. A local extension office can also help you choose the right next question.
Outdoor timing is not set by one birthday. Chicks and ducklings may feather out at different rates. Base the move on adequate feathering, mild enough weather, a dry shelter, predator protection, and calm overnight behavior. A bird that is feathered but still huddles for warmth at night isn't ready for the same outdoor arrangement as a bird that sleeps comfortably without added heat. For the chick side of that decision, see When can baby chicks move outside?
For six babies, prepare about 3 square feet at the start and plan to expand toward 6 square feet as they grow. Set up the divider or spare brooder before the birds arrive. Then run the water system for a full 24 hours. Fill the drinker, place it on its platform and catch tray, and check whether the floor beneath it stays dry through several refill cycles. The test will show you more than an empty brooder can. A detailed checklist is in How to set up a chick brooder before hatch day.
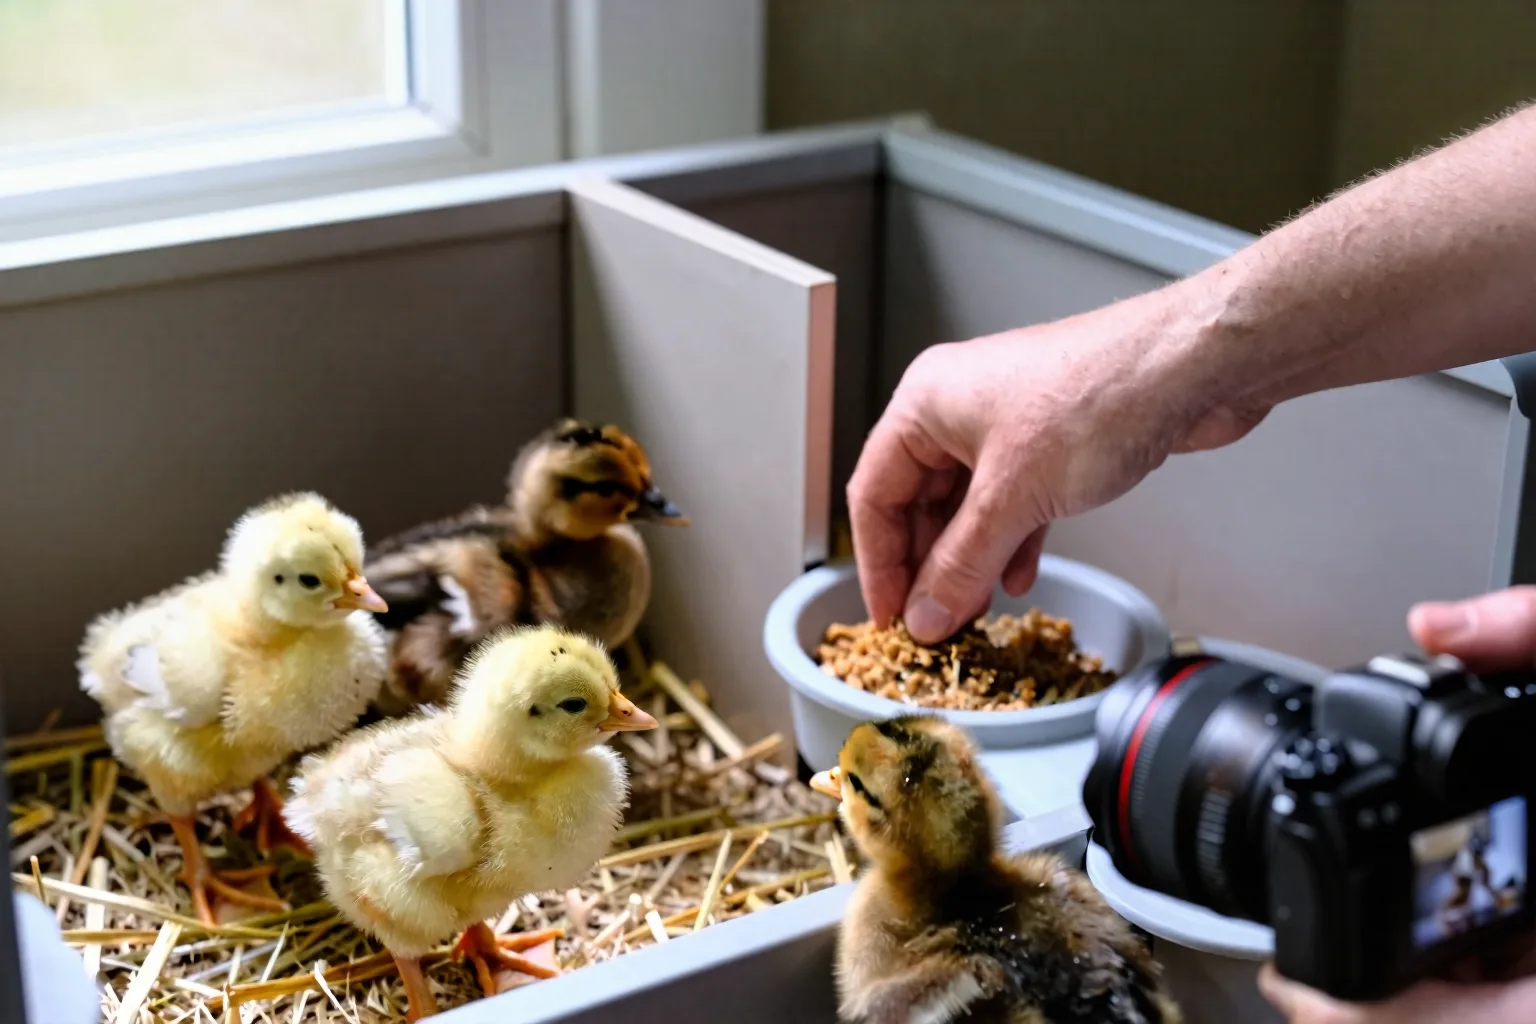
This week, mark out the starting 3-square-foot footprint, install the heat source, and test the contained water zone before ordering or bringing home your birds. Keep the divider ready. If the group stays dry, has equal access to feed and water, and spreads comfortably across the heat gradient, raising baby chicks and ducks together can be a workable small-flock arrangement rather than a daily rescue job.