Brooder Temperature for Chicks: Week-by-Week Guide
Brooder temperature for chicks starts at 90–95°F (32–35°C) in a warm zone at chick height during week one, not in a 90–95°F box. Then lower the warm-zone target by roughly 5°F each week. The calendar is a starting line. Feathering, room temperature, drafts, and your chicks' behavior decide whether you keep moving.
That distinction prevents a common setup mistake. A lamp can make one patch very hot while the far wall stays cool. A heat plate can warm your birds beneath its edge without warming the whole room. Your brooder needs a warm place and a cooler retreat, not one uniform temperature.
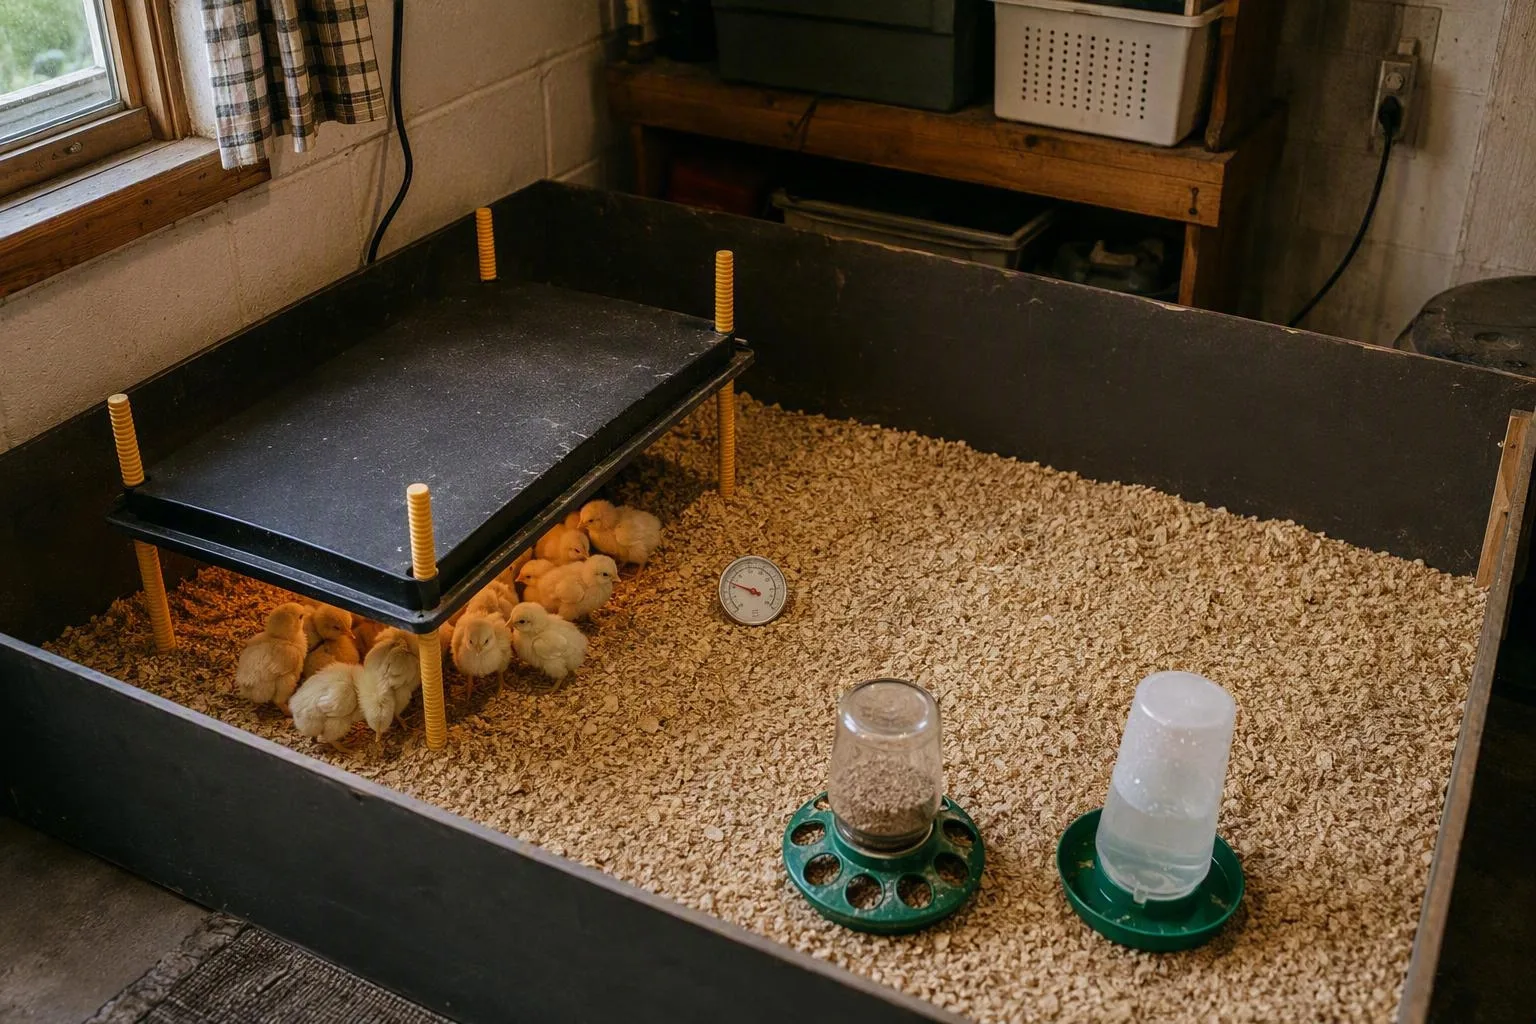
Start at 90–95°F where the chicks stand, not where the lamp shines
The 90–95°F range is a practical starting recommendation for day-old standard layer and dual-purpose chicks. Young chicks have limited insulation, and their temperature control is still developing. External warmth gives them help while their feathers grow. The warm zone is not meant to replace their ability to move away from heat.
Measure the warm patch at chick height
Put the thermometer sensor on the bedding where your chicks stand or rest. For a heat lamp, that usually means the floor beneath the edge of the heated patch, with the sensor kept out of direct radiant glare if possible. For a heat plate, place the sensor on the bedding just inside the heated edge, without touching the plate. Follow the plate's height instructions as the main adjustment. A wall-mounted thermometer can be several degrees different from the spot that matters.
Let the setup settle before you trust the reading. Check the warm zone and the cooler side. If the room is cold, the warm patch may be smaller than expected. If the brooder is large, heat may not travel far enough. A draft can also make a reading look acceptable while your chicks still feel chilled. If you're raising baby chicks indoors, choose a location away from doors, vents, and direct sun.
Build a gradient before your chicks arrive
Use solid lower sides to block moving air, while leaving ventilation above chick level. Put bedding, feed, and water in the usable area, but leave an unheated retreat. In a warm summer room, that retreat matters even more because a lamp can turn a comfortable corner into an overheated one. Heat only the area your chicks need to warm up.
Pre-arrival checklist
- Lay down dry, non-slip bedding and remove sharp edges or gaps.
- Set the thermometer at bedding level in the warm zone.
- Leave enough cooler floor space for every chick to step away.
- Keep water and cords protected from spills and pecking.
- Secure the heat source according to its instructions before the chicks arrive.
Consider six chicks in a 2-by-3-foot brooder in a 62°F room. If the heated edge reads 92°F and the chicks sleep just outside it, that is a useful gradient. If they pile directly beneath the source and call continuously, check for a draft, a heat plate set too high, or a warm patch that is too small before simply raising the target.
The week-by-week ladder: reduce heat by about 5°F at a time
Use this chick brooder temperature chart as a reference for standard layer or dual-purpose chicks. The figures describe the warm zone, not the entire brooder. The Celsius figures are rounded.
| Age | Warm-zone starting range | Adjustment question |
|---|---|---|
| Week 1 | 90–95°F / 32–35°C | Can your chicks warm up and then spread out? |
| Week 2 | 85–90°F / 29–32°C | Are they still choosing warmth to sleep? |
| Week 3 | 80–85°F / 27–29°C | Are new feathers covering more of the body? |
| Week 4 | 75–80°F / 24–27°C | Do they remain active without constant huddling? |
| Week 5 | About 70–75°F / 21–24°C if heat is still needed | Can they settle comfortably through the night? |
| Week 6 | Room or outdoor temperature | Only if fully feathered, dry, active, and comfortable. |
This is a commonly used starting ladder, not a command to force the temperature lower on a birthday. The five-degree step gives your birds time to experience a smaller change while you watch the result. If they respond well, continue. If they huddle, call persistently, or avoid the warm zone, hold the previous setting and find the reason.
Let feathering and flock size change the schedule
Bantams may need a slower taper because their smaller bodies offer less reserve in a chilly room. Fast-feathering chicks may be ready to reduce heat sooner, while slow-feathering birds may need the warm zone for longer. Those are reasons to adjust the timing, not reasons to abandon the temperature check.
A small batch in a large brooder also has less shared body warmth and more floor to heat. Give three chicks a manageable heated area rather than trying to warm a huge box. A cold garage, an unheated shed, and a heated utility room can all need different settings even with the same breed and age.
Heat-source design changes the reading too. A lamp creates a concentrated patch. A plate creates warmth under a surface and may leave the surrounding air much cooler. Measure the place your birds use, then compare it with their behavior. For the wider routine, see raising baby chicks week by week rather than treating temperature as a separate job.
Use the chicks as a second thermometer
The thermometer tells you what sensor sees. Your chicks tell you whether that reading is useful. Watch them for several minutes after they wake, eat, or drink. A single still moment can mislead you, but the pattern of resting and moving usually gives you a practical direction.
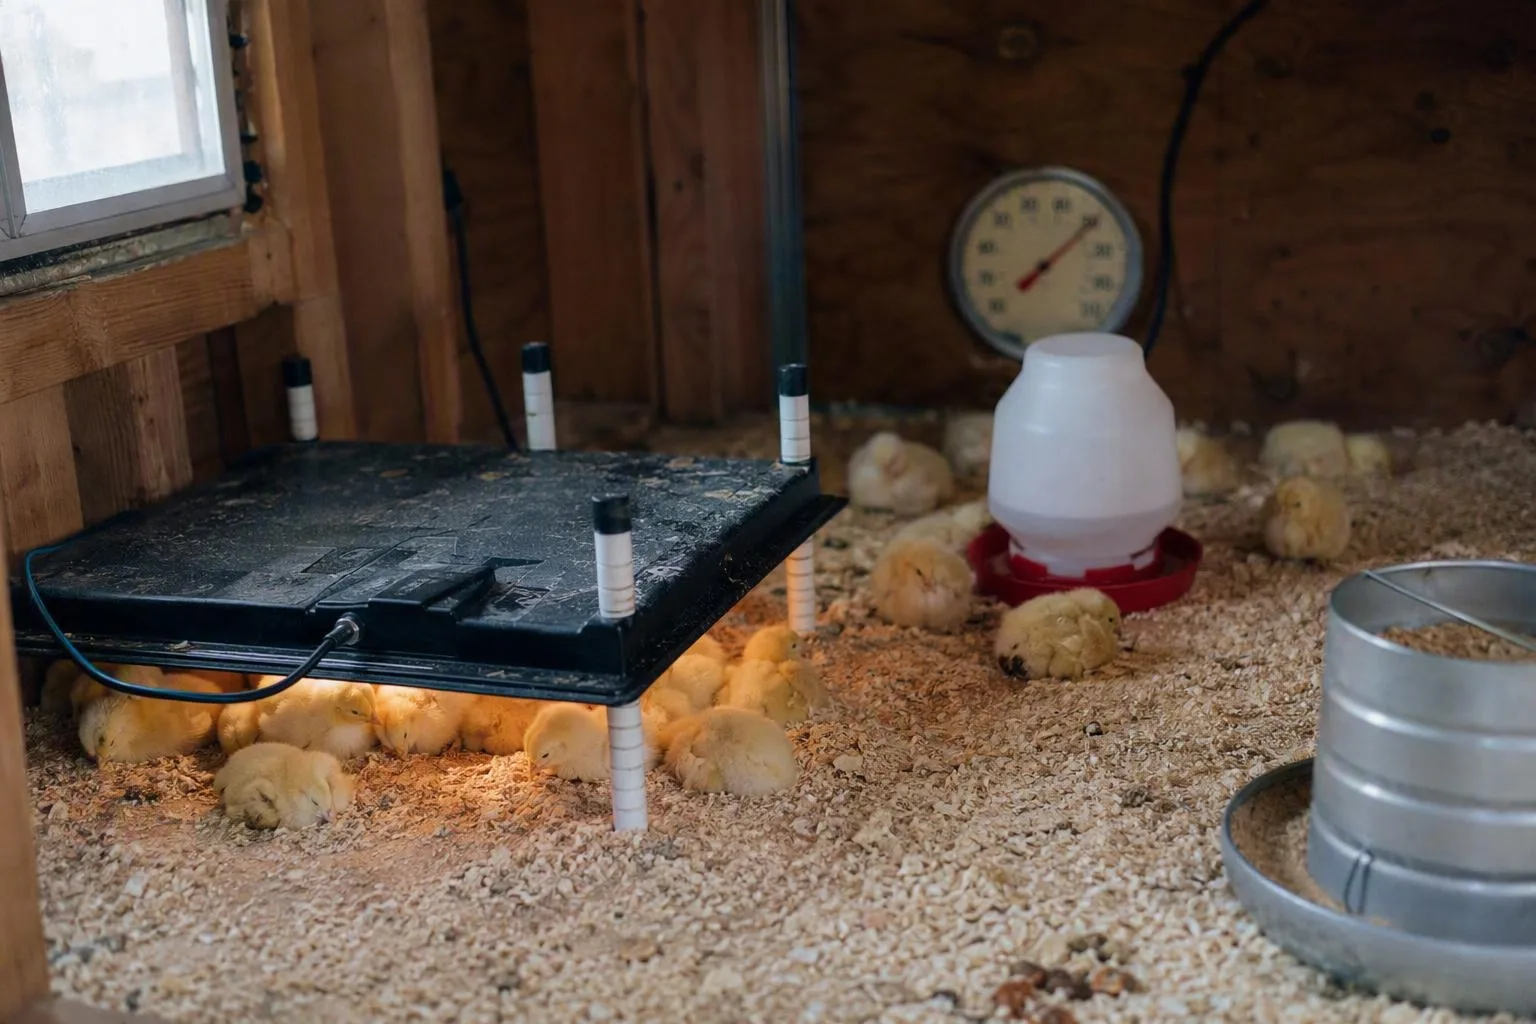
When the brooder feels right
Comfortable chicks are quiet but not motionless. They peck, drink, wander, nap, and return to the warm zone when they need it. You should see them spread through the brooder instead of forming one tight mass. Some will sleep under warmth while others rest nearby. That variation is what a usable gradient looks like.
When cold is the message
Chicks that are cold often huddle directly under the heat source and make repeated, sharp peeps. They may press together even when there is open floor around them. Feet that feel cool are an extra clue when they appear with huddling and calling, not a diagnosis by themselves. Check the warm-zone reading, then look for a draft or a heat source that is too high or too weak.
When the warm patch is too much
Overheated chicks usually leave the center. They may stay at the brooder's edges, pant, hold their wings away from their bodies, or refuse to enter the warm zone. Reduce the heated area safely and make sure the cooler retreat is open. Do not solve overheating by removing ventilation or covering the whole brooder.
When crowding points sideways
One-sided crowding is a location clue. If the group presses against the wall farthest from the heat, inspect for a draft on the heated side. If they bunch at one edge of a lamp's patch, the heat pattern may be uneven. If they crowd beside a divider, the cooler retreat may be blocked. A useful troubleshooting habit: put the thermometer in the warm patch, stand back for ten minutes, and watch where the chicks settle. Change one thing at a time so you know which adjustment helped.
- For huddling, check drafts first, then increase warmth by lowering a plate or lamp only within the product instructions.
- For panting or edge-hugging, reduce warmth by raising the source or changing its setting safely.
- For side crowding, add lower-level draft protection without sealing the upper ventilation.
- For a reading that disagrees with behavior, move the sensor to bedding level and check again.
Behavior is a useful guide, not a substitute for examining a weak or lethargic chick. A chick that stays apart, cannot stand well, or fails to improve after being warmed needs more than a temperature adjustment.
Taper heat when feathering and conditions agree
Week six is not an automatic switch-off date. Many standard chicks are ready to leave supplemental heat around five to six weeks when their backs, breasts, and wings are well feathered, they remain active, and they settle without huddling. Sparse feathers, damp bedding, cold nights, or a chilly coop call for a slower taper.
A simple final-week test
- Choose a mild daytime period and lower the warm-zone setting by one step.
- Leave the cooler retreat open and watch how your chicks behave after resting.
- Check them through the coldest part of the night, often shortly before dawn in a typical backyard setup.
- Inspect the bedding in the morning. If it is damp, fix the housing before relying on extra heat.
- If your chicks crowd tightly or call persistently, restore the last comfortable setting and try again more slowly.
If you're planning on raising baby chicks outside, move the decision beyond the brooder thermometer. The coop must be dry, sheltered from moving air at bird level, and warm enough for the birds to settle without a heat source. A gradual move to raising baby chicks outside is easier to judge when you have already watched how they respond to small changes indoors.
Shut down heat without improvising
An improvised lamp hung by its cord or set over loose bedding isn't a safe brooder setup. Use the fixture's specified support, keep the hot surface clear of bedding and water, protect cords from pecking, and inspect the equipment before each change. A heat plate avoids an exposed bulb, but its cord, clearance, and mounting still need attention. Check local fire-authority guidance for safe use of heat lamps, cords, and temporary brooder equipment before you plug in a lamp.
Know when more heat is the wrong answer
Supplemental heat cannot correct an infection, a developmental problem, or poor access to food and water. Persistent weakness, breathing trouble, ongoing diarrhea, or failure to eat or drink calls for a poultry veterinarian or a local extension office. Warmth can support a chilled chick while you arrange help. It should not delay that call.
Keep University extension guidance on chick brooding temperatures, heat reduction, and chick behavior nearby as a second reference, but make your own setup fit your room, flock size, heat source, and weather.
This week, assemble the brooder before your chicks arrive. Run the heat source, place the thermometer at bedding level, record the warm-zone reading, and mark the cooler retreat with your hand. If your birds are coming from incubating chicken eggs, set that brooder check on the hatch calendar rather than leaving it until hatch day. Save this ladder beside the brooder, then let your birds' behavior decide the next adjustment.