Poop Board for Chicken Coop: Size, Height, and Bedding
A poop board that is too short still leaves you scraping the wall. For a single straight roost, start with a board as long as the roost plus 2 to 6 inches at each end, make it about 18 to 24 inches deep, and leave 12 to 18 inches between the board surface and the lowest perch. Those are starting dimensions, not sacred numbers. Breed, roost arrangement, and door access can move them.
The useful test is simple: your birds should be able to roost above it, the board should catch the night droppings, and you should be able to remove or scrape it without climbing into the coop.
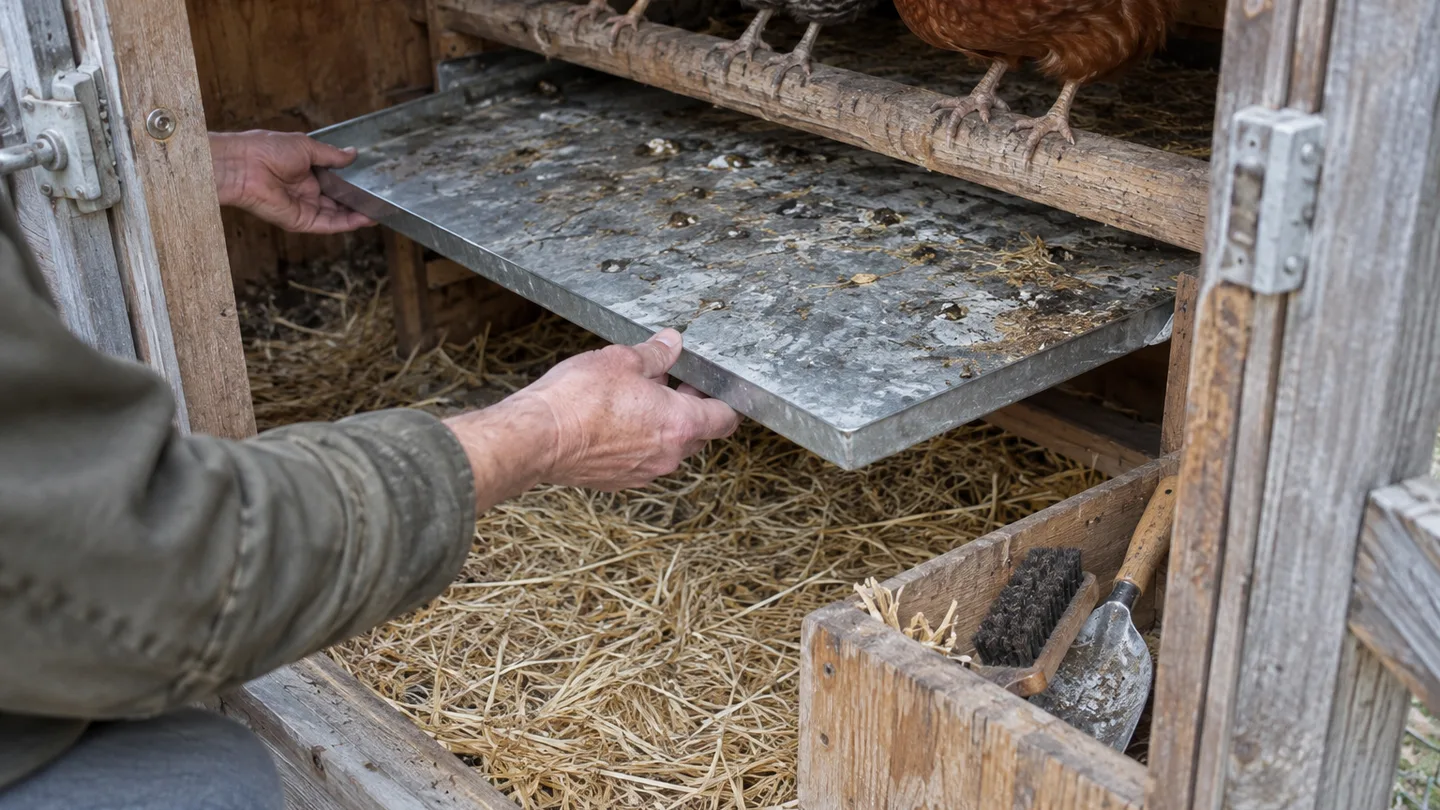
Start with the roost: sizing a poop board for length and width
Measure the actual roost instead of buying a board based only on flock size. The board should cover the full length of the perch. Where the coop allows, add roughly 2 to 6 inches beyond each end. That extra margin catches droppings when a hen shuffles sideways, turns around, or roosts with her tail angled toward the edge.
For a 4-foot roost, that gives you a board about 52 to 60 inches long. For a 6-foot roost, plan on about 76 to 84 inches. The arithmetic matters because a board that stops exactly at the perch ends leaves a narrow strip of floor or wall to clean every morning.
For one straight row, start with 18 to 24 inches of depth. Measure from the back edge near the wall to the front edge you can reach. The board needs enough front-to-back area to catch normal variation without becoming so wide that it blocks the clean-out door or creates a large, awkward shelf.
A narrow board usually fails at the back wall or the front edge first. If the roost sits close to the wall, droppings can land against the wall rather than in the middle of the board. If the perch is high or birds kick as they settle, the front edge can be missed. A staggered or two-level roost needs wider coverage or separate boards. Do not assume one 18-inch shelf will catch droppings from perches spread across the whole coop.
The 12–18-inch drop zone beneath the perch
Set the upper surface of the poop board about 12 to 18 inches below the lowest roost as a practical starting point. This gives droppings room to fall while keeping the board close enough to scrape. It also helps stop the board from becoming a second perch.
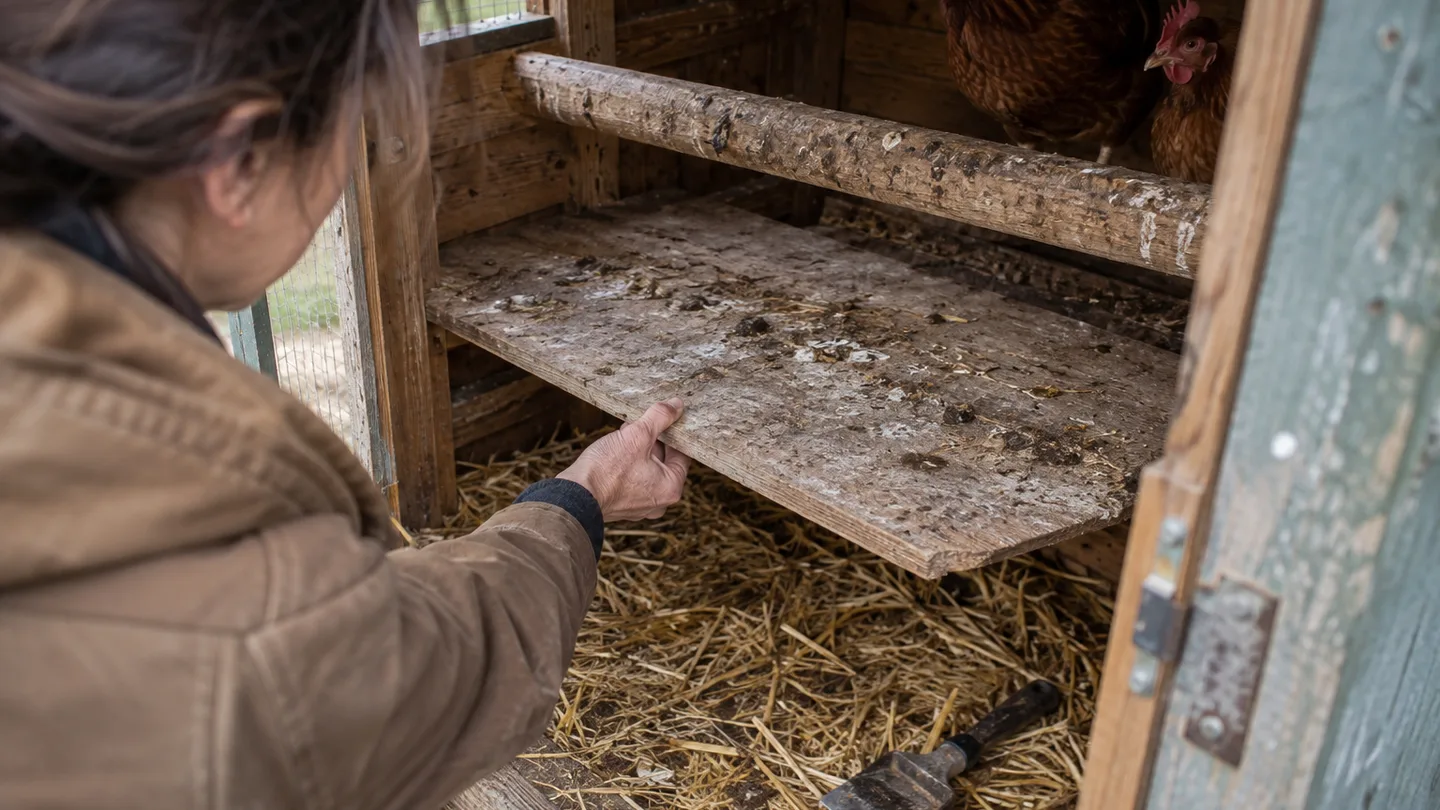
Use the lower end of that range when your hens are steady jumpers, the board is easy to reach, and the landing route is open. Give yourself more room toward the upper end for heavy-bodied birds, a broad perch, or a layout where tails and feet hang lower. Older hens may need a lower overall roost and a shorter jump. Do not solve that problem by raising the board until it crowds the perch. Lower the whole arrangement if the birds are struggling.
Keep roost-to-board distance separate from board height above the coop floor. A board can sit 15 inches below the perch but still be too high above the floor if it blocks the door, nest boxes, or the birds’ landing path. In a small coop, check the route from the roost to the floor as well as the route from the board to your hands.
A board is too close when hens can step onto it comfortably, stand on the front lip, or leave most droppings on the board instead of dropping past it. It is too low in the structure when the tray blocks floor bedding, narrows the landing area, or becomes an obstacle that birds must jump over. The right gap is the one that catches waste without turning the board into furniture your birds use.
One shelf, two trays, or a full-width catch pan?
Choose the layout from the roost arrangement, not from a picture of someone else’s coop. A simple single shelf works well under one straight 3- to 6-foot perch. Multiple trays make more sense when the roosts are staggered or when one large panel would be too heavy to remove.
| Layout | Useful when | Trade-off |
|---|---|---|
| One board | One straight roost with clear access | Simple to scrape, but the whole board must be removed at once |
| Two or more trays | Parallel or staggered roosts, or a narrow clean-out door | Easier to lift, with more seams and edges to inspect |
| Full-width catch pan | Several perches occupy one wall or span the coop | Broad coverage, but it can become heavy and awkward when loaded |
Every perch needs a covered landing area beneath it. An upper roost that overhangs an uncovered section will put droppings on the floor, even if the rest of the board is perfectly sized.
For a small backyard flock, I generally prefer separate removable trays when the coop has more than one roost level. A smaller tray is easier to carry, scrape, and wash. A fixed shelf can be sturdier, but only if you can reach every corner with a scraper and a brush.
Bedding depth is the difference between dry and caked
A poop board needs a shallow working layer, not a deep-litter floor. Too little bedding leaves wet spots stuck to the surface. Too much bedding adds weight, spills over the front lip, and can make a removable tray awkward to handle.
- Pine shavings: Start with about 1 to 2 inches. They are light and easy to scrape, but loose flakes can scatter and damp patches can mat together.
- Suitable wood pellets: Start with roughly 1/2 to 1 inch, then follow the product instructions. Pellets take up less space than a deep layer, but they can break down into fine material or clump when wet.
- Low-dust zeolite or poultry-litter granules: A thin layer of about 1/4 to 1/2 inch may suit a board where the product is specifically appropriate for poultry. These materials are denser, so the loaded tray becomes heavier.
Those amounts are working depths for the board, not instructions for the coop floor. Floor bedding has a different job. It gives birds a dry walking surface and protects feet from a bare, damp floor. The board should remove the concentrated waste under the roost without turning into another deep litter system.
I would skip aromatic or strongly scented products, dusty construction sawdust, moldy material, and anything made from treated wood. Mineral products should be used only according to their label. If the bedding becomes airborne when you scrape, it is not earning its place on a small board.
Your choice depends on the problem you are trying to solve. Light shavings are easy to carry. Pellets keep the working layer compact. Granules can be useful where a dense, shallow material suits the tray. None removes the need to check the board for moisture.
Build it so wet litter cannot sag, spill, or trap a foot
Small construction details decide whether a chicken coop poop tray stays useful. Add a front lip of about 2 to 3 inches. It should hold loose bedding during scraping without becoming a sharp ledge or a step your birds want to stand on.
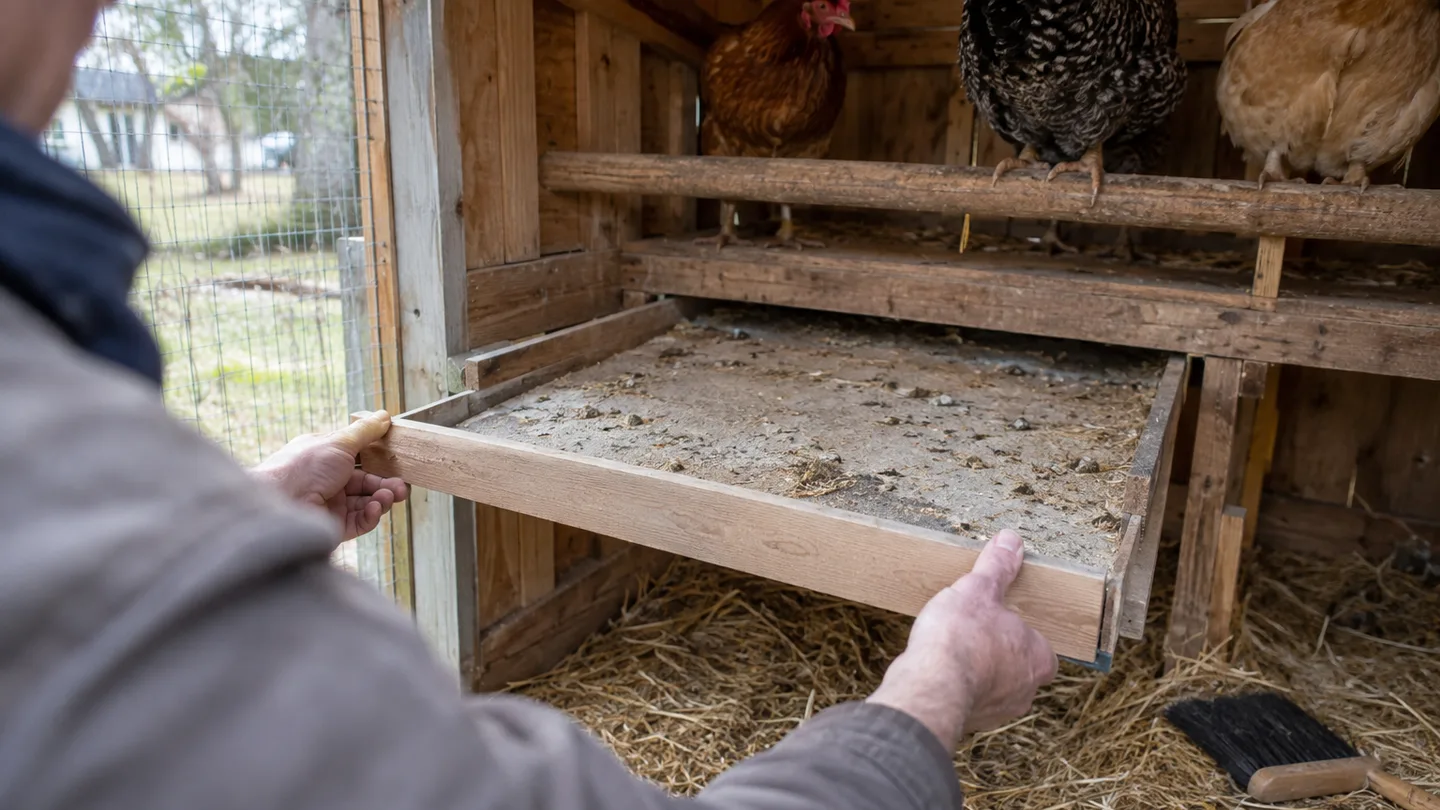
- Round over, sand, or protect exposed edges.
- Support longer boards underneath instead of relying on one pair of side brackets.
- Leave enough clearance to slide the tray out without catching the wall, nest boxes, or door frame.
- Close gaps where droppings or toes could collect between the board and the wall.
As bedding takes on moisture, the loaded tray becomes heavier than a tray holding dry droppings alone. A board longer than about 4 feet may need a centre support, especially if it is made from thin plywood or if you plan to leave a layer of bedding in place between scrapes.
My fit test is deliberately unglamorous. I lay cardboard over the proposed footprint, add a strip at the front to represent the lip, and try sliding it toward the clean-out door. The failure I am looking for is a tray that reaches the door but cannot slide clear. When that happens, I move the footprint or reduce the lip until the tray comes out without disturbing the roost. A catch tray that cannot be removed is a poor design, even if its measurements look right on paper.
Sealed plywood is easy to cut to an odd-shaped coop and can be very rigid when supported properly. Plastic trays are usually easy to wash and do not absorb spilled moisture, but thinner ones can flex under a wet load. Metal pans are rigid and cleanable, though their edges need protection and their weight can make a large pan unpleasant to handle. Pick the material that matches your access, not the material that looks most professional.
Scrape, refresh, wash: a schedule for 3–12 hens
For a small flock, check the board every day. A quick look tells you whether bedding is dry, whether droppings have spilled over the lip, and whether a support or edge has shifted.
- Scrape daily or every other day: Use the daily end for a larger flock, humid weather, a small board, or bedding that cakes quickly. A lightly loaded board in a dry, three-hen setup may be manageable every other day.
- Refresh the shallow bedding about every 3 to 7 days: Replace it sooner if it is wet, stuck in a hard layer, or no longer keeps the tray surface reasonably dry.
- Wash when needed: Wet patches, caked material, or an ammonia smell are reasons to wash rather than simply cover the mess with fresh litter. Let the tray dry before returning it.
Flock size changes the schedule, but so do humidity, board area, bedding type, and how much of the roost is actually covered. A wide, well-ventilated tray under four hens may stay manageable longer than a narrow tray under ten. That is why the check matters more than a calendar promise.
A poop board catches the droppings produced while your birds are roosting. It does not replace dry floor bedding, whole-coop cleaning, or good chicken coop ventilation. If you are trying to decide whether a dropping is simply variable or genuinely unusual, compare the pattern with a chicken poop chart and watch the bird itself rather than diagnosing from one mark.
For an unusual coop shape, compare your plan with university extension guidance on backyard chicken roost space, perch height, and coop layout. If moisture or smell is the recurring problem, poultry extension or veterinary guidance on litter moisture, ammonia, and coop ventilation is a useful second check.
Your 10-minute measuring plan before you buy or cut
Before ordering a tray or cutting plywood, take ten minutes with a tape measure, pencil, and a strip of cardboard. Use this sequence:
- Measure the actual roost. Record its length, thickness, distance from the wall, and height above the floor.
- Check perch space. As a starting allowance, use roughly 8 to 12 inches of perch length per hen. This is a planning range, not a promise that every flock will settle evenly.
- Set board length. Match the roost length, then add about 2 to 6 inches at each end where the coop layout allows.
- Set board depth. For one straight row, start at 18 to 24 inches. Go wider or use separate trays when the roosts are staggered.
- Mark the drop zone. Aim for 12 to 18 inches from the board surface to the lowest roost. Check that heavy or older birds still have a clear landing path.
- Test removal. Tape the outline under the roost and try pulling a cardboard mock-up toward the door. Check the nest boxes, floor bedding, wall, and ventilation openings before fixing anything permanently.
Here is the math for a practical poop board for 6 chickens. Suppose six hens share a 5-foot roost. At 8 to 12 inches per bird, the starting perch allowance is 48 to 72 inches, so the 60-inch roost sits inside that range. Size the board from the roost itself: about 64 to 72 inches long, 18 to 24 inches deep, and 12 to 18 inches below the perch.
This week, tape that proposed footprint beneath your roost and test whether a tray can slide out without disturbing your birds. If it cannot, fix the access before you fix the board. The best poop board is not the biggest one. It is the one you can scrape, dry, and remove before a small mess becomes a coop project.