How to Keep Chickens Out of the Garden: 7 Fixes That Work
Three hens can turn a neat vegetable bed into a scratch pit before your coffee cools. If you’re asking how to keep chickens out of the garden, start with a physical boundary you can inspect, not a smell spray or a plastic owl. Those may buy you a little time. A fence, closed bottom edge, protected seedlings, and a better place to scratch are what give you a repeatable fix.
Before you build anything, watch one release period. Fifteen minutes is enough to show whether your flock flies over, squeezes through, pushes under, follows you toward the beds, or simply heads for the newest patch of loose soil.
Spend 15 minutes finding the entry route before you choose a fix
Stand where you can see the garden and the flock at the same time. Don’t start by chasing birds away. Let the first breach tell you which part of the setup needs work.
- Over the top: raise the boundary, remove launch pads, or add a covered top.
- Through a gap: close the gate edge and choose mesh that matches the age and size of your birds.
- Under the bottom: pin a flat apron to the soil or bury the lower edge.
- Following you: change the release routine and make the garden less rewarding to enter.
- Straight to freshly turned soil: cover the bed and create a separate scratching area.
Breed, age, flock size, and garden layout all change the answer. A small bantam or young pullet can use an opening that an adult hen ignores. A heavy, calm breed may stay on the ground while a lighter bird treats a nearby planter as a launch step. Three hens approaching one narrow gate also create more pressure at that point than three hens spread around a long run.
In my own three-hen setup, I watched one 15-minute release after the morning feed. Two birds stayed near the path. The third went straight to a newly watered bed, slipped under the gate where the soil had softened, and scratched three shallow hollows before I reached her. I added a flat wire apron, pegged it flush, and moved a planter that had become a step. The next test showed that the lower edge was fixed; the birds then tried the open side of the gate instead. That was useful information, not a failed repair.
Match the fix to the route. Otherwise, you can spend a Saturday adding height to a fence while the birds continue using a two-inch gap underneath.
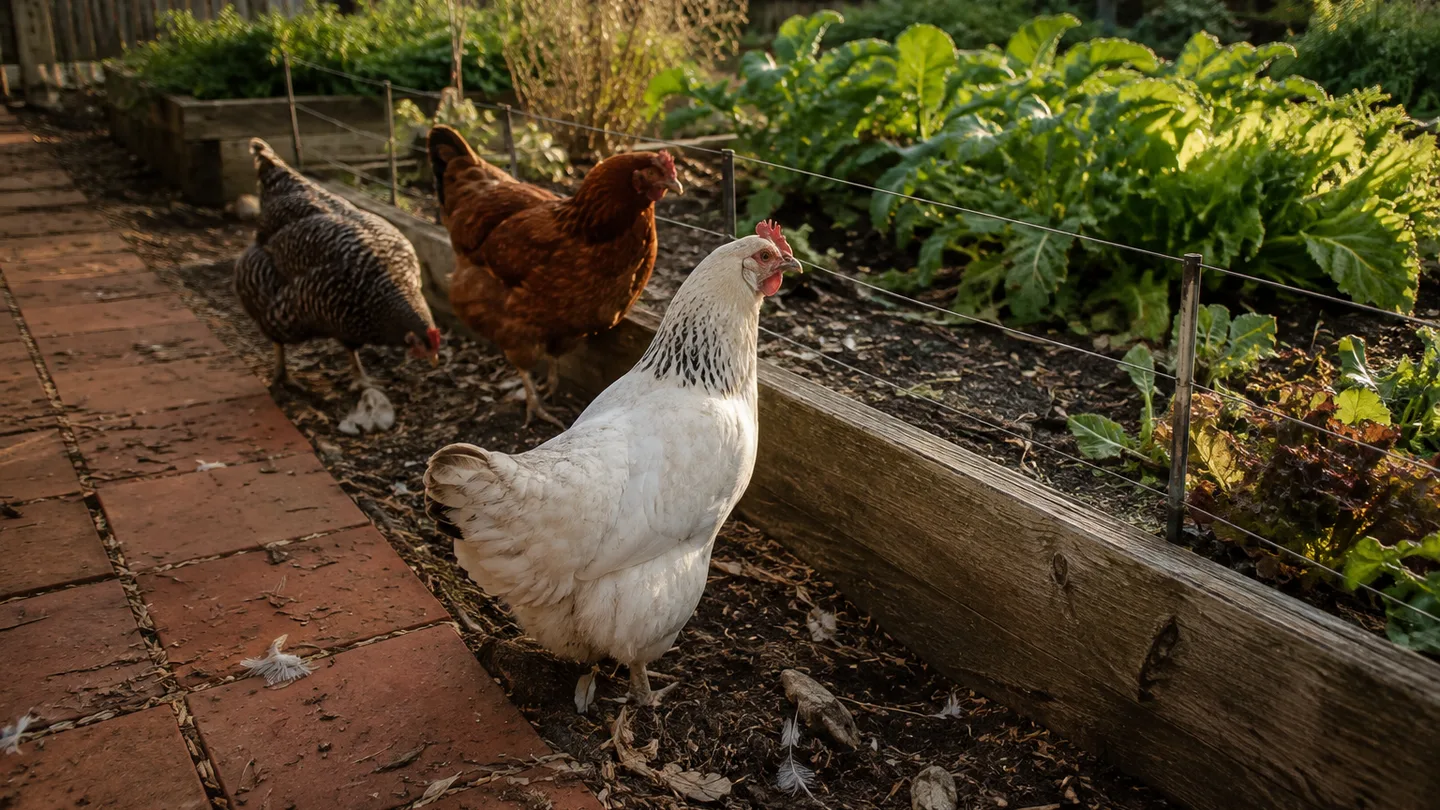
Fixes 1–3: a 4-foot boundary, suitable mesh, and a bottom edge hens cannot push under
Fix 1: start with a four-foot boundary. For many standard backyard hens, a 4-foot garden fence is a sensible starting point. It gives you a clear physical line without making the garden look like a small fortress. It is not a universal limit. Strong flyers, determined breeds, and birds with a convenient step on their side may need a 5–6-foot fence, an inward-sloping extension, or a complete cover.
Keep the top edge easy to inspect. A loose, sagging section invites a bird to land, balance, and try again. If one hen repeatedly reaches the top, watch how she gets there. A nearby planter may be the real problem.
Fix 2: choose mesh for the job. Chicken wire, welded wire, and hardware cloth are not interchangeable.
- Chicken wire: flexible and often adequate for separating adult hens from a garden when predator resistance is not the goal. It bends easily and should not be treated as a secure predator barrier.
- About 1-inch welded wire: stiffer and easier to keep upright as a garden boundary. It suits many adult-hen setups, but larger openings may not contain chicks or very small birds.
- About 1/2-inch hardware cloth: useful where small birds, chicks, or unwanted animal access are part of the problem. It costs more and takes more effort to cut and fasten, so use it where the smaller opening earns its keep.
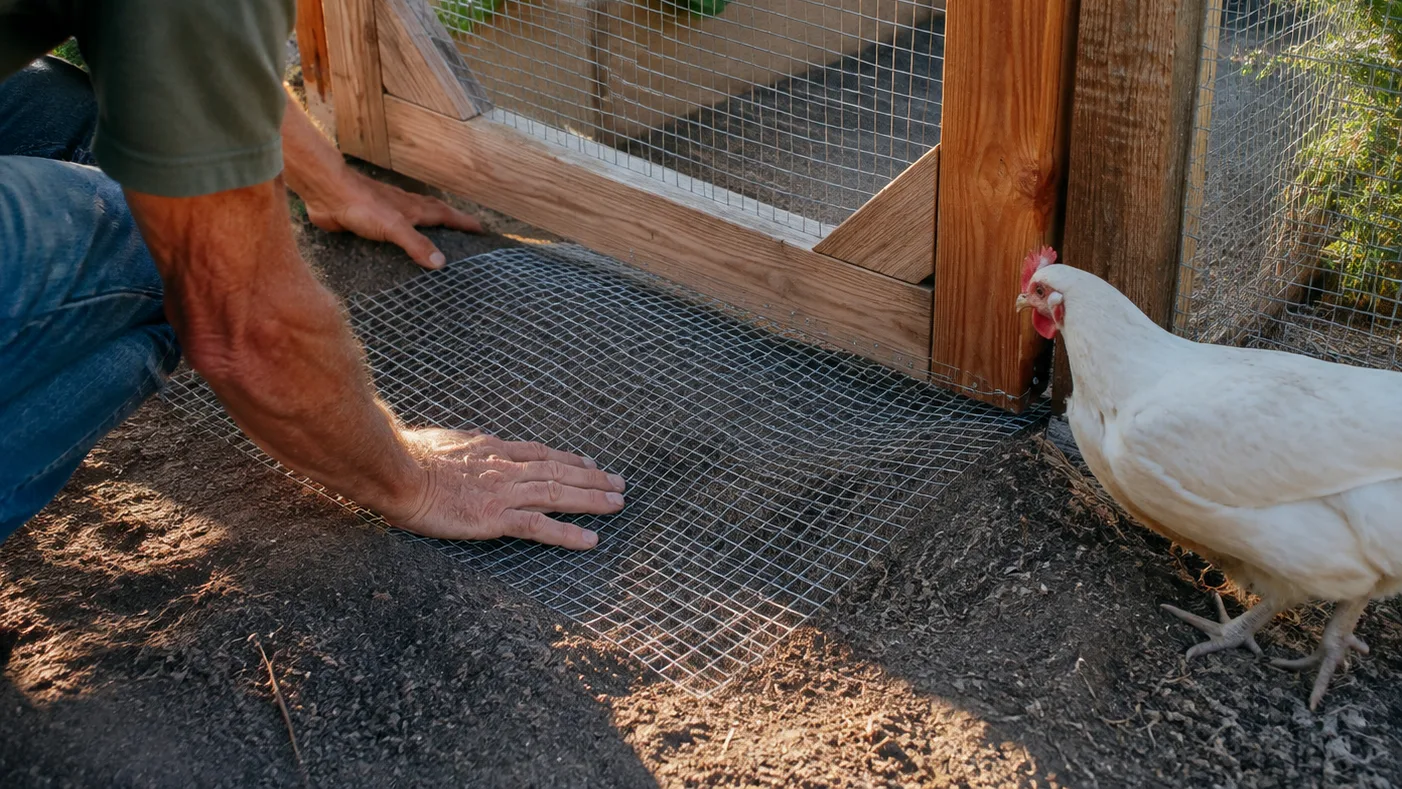
Close the gate as carefully as the fence. A gate that looks shut from standing height can still leave a ground-level opening. Add a narrow strip of mesh, a timber stop, or a threshold that meets the soil without creating a sharp edge. Check both sides after watering, because wet soil can settle away from the frame.
Fix 3: make the bottom edge boring and solid. If hens are pushing under the fence, lay a 6–12-inch strip of mesh flat on the garden side and pin it to the ground. You can also bury the bottom 2–4 inches. The goal is to remove the easy first movement: beak under the edge, shoulder against the wire, then a gap wide enough for the rest of the bird.
Look for the failure signs. A line of loose soil along the fence points to an under-route. Bowed mesh points to a weak material or poor fastening. Feather marks and repeated toe prints near the top point to a height or launch-pad problem. Fix the sign you can see instead of adding a random deterrent.
Fixes 4–5: cover seedlings and give scratching a better 8–10-square-foot-per-hen destination
Fix 4: protect the plants themselves. Seedlings and freshly seeded beds are difficult to defend with a fence alone. The soil is soft, the plants are easy to reach, and a hen can do damage before you get across the yard.
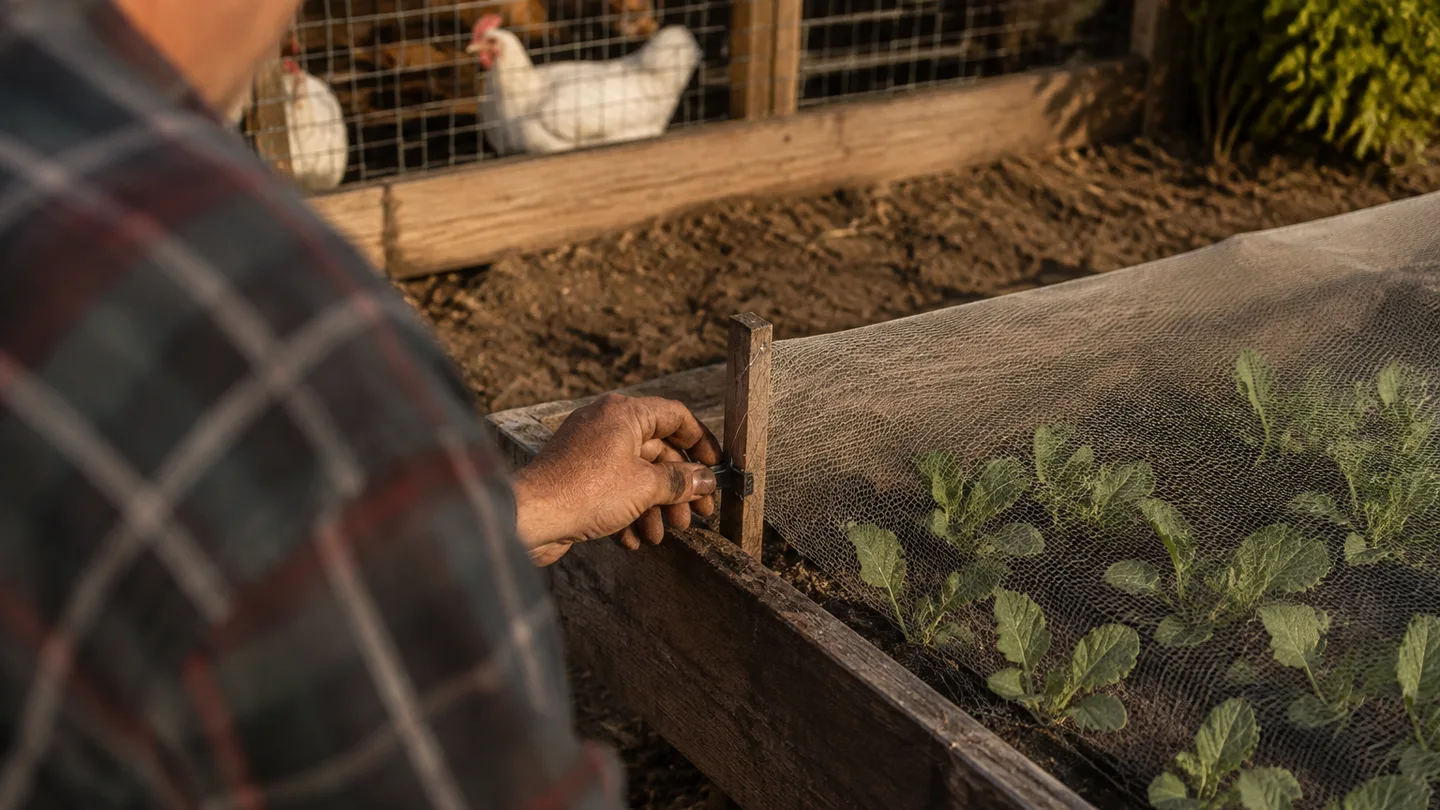
Use a rigid cloche, a hoop frame, or taut, highly visible netting over the bed. Secure every edge. A board, clip, or ground staple is useful if it cannot create a sharp snag. Keep the cover tight enough that a bird cannot step into a loose pocket.
My practical rule is simple: if I can lift the cover with one finger, I assume a hen can move it. That is not a product standard. It is a quick backyard test for whether the edge needs another peg or a heavier frame.
Loose, low loops of netting deserve extra attention because a foot can enter a loop while a bird is scratching or stepping backward. If you use netting rather than a rigid frame, compare the edges and tension with poultry welfare guidance on safe fencing, netting, and entanglement prevention.
Fix 5: give the flock somewhere better to work. Plan on roughly 8–10 square feet of outdoor scratching space per hen in the alternative area. For three hens, that is about 24–30 square feet. This is a practical starting point, not a promise that birds will ignore a garden forever.
Put the scratch area where you can reach it easily. Add a dry dust-bath zone with loose soil or sand. Keep feed and water away from the garden edge so the birds are not constantly crossing the boundary to eat and drink. Coarse mulch or temporary boards can also make a newly planted bed less inviting than a designated patch of loose material.
The useful question is not whether chickens like scratching. They do. The useful question is whether the garden is the only place where scratching pays off.
Fix 6: feed normally, then test 10–15-minute supervised garden-free sessions
Don’t use hunger as training. I keep the flock’s normal ration and clean water available, then work on the timing and the route. A bird that is searching hard for food will inspect every soft patch in the yard, which makes the garden a difficult place to practise self-control.
- Feed the normal ration and refresh the water.
- Release the flock after its usual feeding period, when the birds are less frantic about finding food.
- Set a timer for 10–15 minutes and stay close enough to redirect a bird calmly.
- Scatter a small amount of approved scratch in the designated area, not beside the garden gate.
- Return the flock to its run when the timer ends, even if the session went well.
Extend the time in small steps only when the garden edge stays untouched. If the flock heads straight for bare beds, the routine is too loose for that flock or that layout. It does not mean you should cut the normal ration. Tighten the boundary, move the reward, or shorten the next session.
This approach works best when you can see the birds. Supervised access is management, not a permanent fence replacement. If you cannot stay nearby, put the flock back in its run.
Fix 7: remove launch pads, strengthen the top edge, and run a seven-day test
A hen that clears a 4-foot fence may not be an unusually gifted flyer. She may simply have a planter, stacked lumber, low branch, compost bin, or feed tub within roughly 2–3 feet of the fence. Remove those steps first. It is cheaper and cleaner than raising every side of the garden.
If the same bird still gets over, add an 18–24-inch inward-sloping extension toward the birds’ side, or cover the top completely. The extension makes the approach less comfortable and removes the straight launch line. Fasten it firmly. A flexible flap that moves in the wind can become a perch rather than a deterrent.
Then run a seven-day test. Inspect the same weak point:
- after the morning release,
- after you water or work the beds,
- after a windy period, and
- before you assume the repair has held.
Record each breach with a quick note: over, through, under, or pulled by fresh soil. If every breach is at the gate, repair the gate. If every breach follows a planter, move the planter. Random scare devices make the yard busier without teaching you what the flock is actually using.
This week, set aside 15 minutes to watch the first release, then build the smallest complete fix for the route you see. For three hens, that might mean a 4-foot boundary, a 6–12-inch ground apron, a covered seed bed, and a 24–30-square-foot scratch area. Check your local extension office for region-specific housing guidance, then use the Best predator proof chicken coop guide when you review the whole run. The wider questions of how much space do chickens need and whether free range chickens suit your yard belong in that same decision. A garden stays safer when the flock has a clear route, a secure boundary, and somewhere else worth scratching.