How to Get Rid of Rats in a Chicken Coop—and Keep Them Out
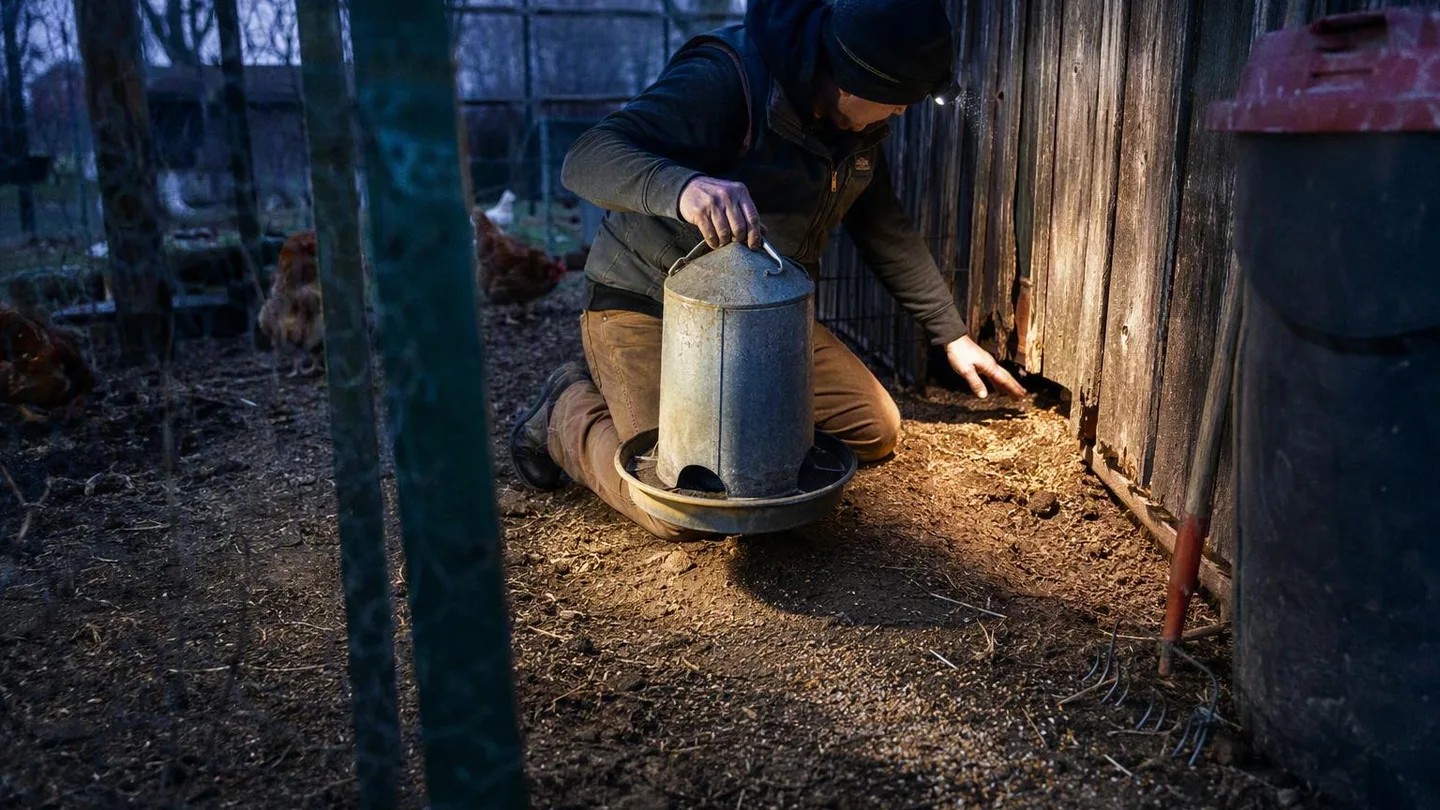
At 7 p.m., take the feeder out of the coop, sweep up loose grain, and inspect the wall under the nest boxes. That first reset matters more than buying a larger trap. If you're asking how to get rid of rats in a chicken coop, start by removing the reward, then close the route and trap what remains.
Keep clean water available. Move calmly. You want your hens settled while you work, and you want a clear picture of whether the rat activity is current or old.
A rat problem is usually a food-and-access problem before it is a trapping problem.
The first 24 hours: remove food, confirm rat activity, and protect your hens
Bring the feeder into a secure place at dusk. Sweep spilled feed from the floor, scrape wet mash from the ground, and remove treats before nightfall. Then inspect the places a rat can travel without crossing the middle of the coop: along walls, under nest boxes, behind stored boards, beside the feed area, and around pipe or cable openings.
Look for several signs together rather than relying on one dropping.
- Droppings: rat droppings are often roughly 1/2 to 3/4 inch long and thicker than mouse droppings.
- Gnawing: check feed bags, plastic corners, wood edges, wiring, and thin doors.
- Grease rubs: dark smears along a wall or narrow edge can show a repeated travel line.
- Burrows: inspect loose soil beside the run, under a gate, and where the ground meets a wall.
- Egg damage: chewed shells or missing contents can mean rats have reached the nest boxes.
Mouse droppings are usually much smaller, like dark grains. One sign cannot give you a reliable count of rats, but a cluster of fresh signs tells you where to work first.
A daylight sighting deserves attention because it can mean the route is being used when the coop is normally quiet. It is a prompt to inspect that day, not a reason to panic.
Trapping before food removal gives a rat an easy alternative. If grain remains available, a trap has to compete with a free meal. Remove the food first, and your trap becomes part of a route-control plan instead of the only thing standing between the bird feed and the rat.
How do you make chicken feed boring to rats?
Use the feed bag's own daily guidance as your starting point. For rough planning, 115 to 160 grams per adult layer per day is a useful range for many layer feeds, but breed, weather, forage, age, and feed type can move the amount. Treat the range as a measuring aid, not a fixed prescription.
For a flock of six hens, a planning point of 130 grams each gives 780 grams for one day. Measure that portion, watch what remains, and adjust gradually. A full feeder left overnight is not a feeding plan; it is a reliable food source for anything that can reach it.
Store the main supply in a rigid container with a closing lid. A sack clipped shut is easier to chew through than a sound plastic or metal bin. Clean spilled feed the same day. Wet mash, scratch, fruit, and kitchen scraps should not sit in the run overnight.
An automatic or treadle feeder can reduce access while your hens eat, but it does not protect the bulk feed in storage or clean up a spill. Check the feeder's corners, hinge, treadle, and floor below it. Rats need only one overlooked food pocket to keep testing the area.
Seal openings at 1/2 inch, then stop the dig-under route
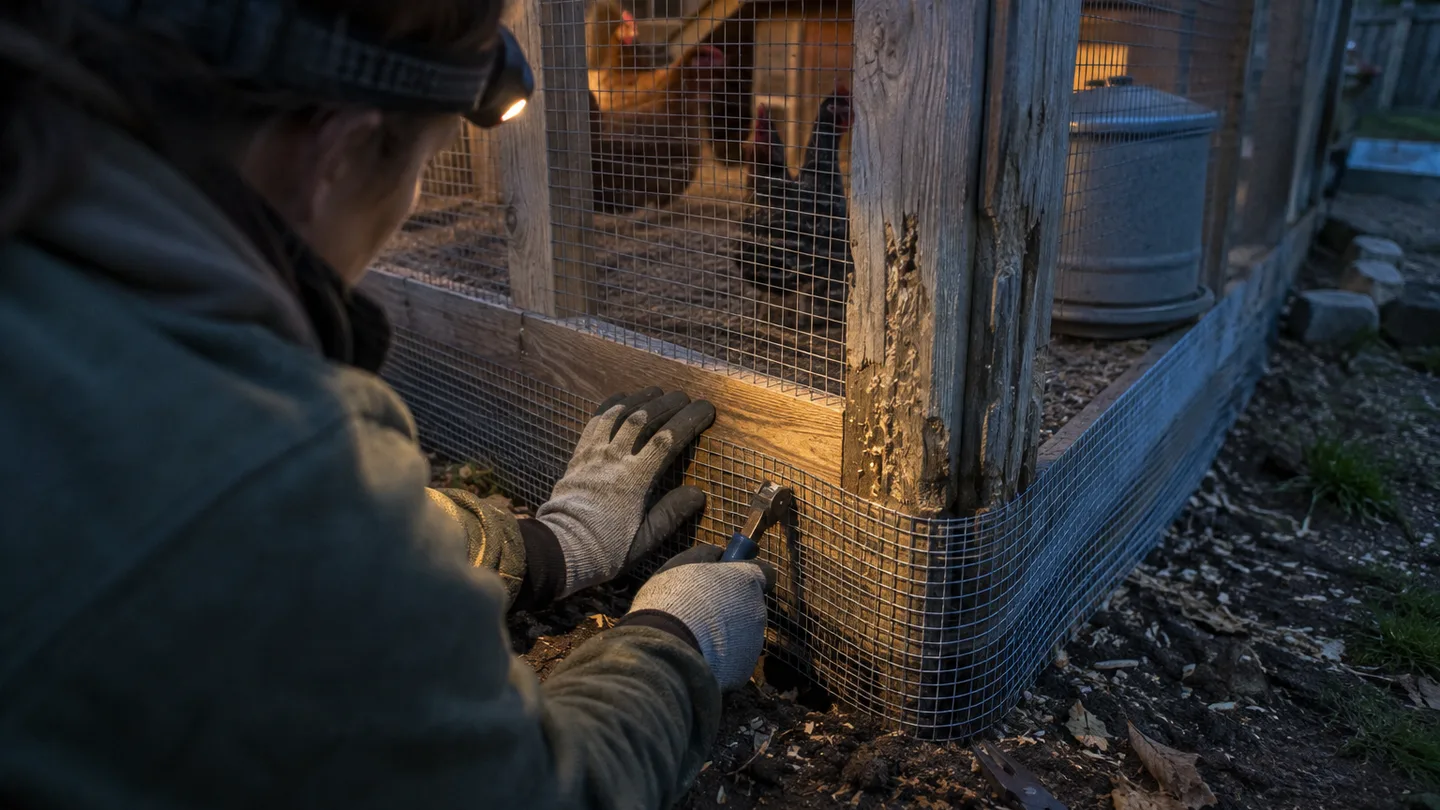
Once the food is controlled, close every route you can find. I use 1/2-inch welded hardware cloth as the baseline barrier for a rat-prone backyard coop. Around chicks, or where mice are also getting through, 1/4-inch mesh gives you a tighter opening to manage.
At ground level, extend the barrier 6 to 12 inches outward as an apron, or bury the lower edge where the soil allows. The point is to make a straight dig-under route meet mesh instead of open space. A solid panel above ground does not help if a rat can pass below it.
Fasten the mesh to sound framing with washers or another broad fixing point. Overlap seams. Cover the corners. Check vents, door thresholds, roof-to-wall joints, and pipe penetrations. A small unprotected seam can undo an otherwise strong panel.
Think of chicken wire as a bird-retention material, not a dependable rat-exclusion layer. Before buying supplies, compare hardware cloth vs chicken wire with the actual gap size and wire stiffness in mind.
Check the loose soil beside a wall as well as the panel itself. That edge can bypass an intact section of mesh, so inspect both the barrier and the ground immediately outside it.
Trap along the walls, not in the birds' path
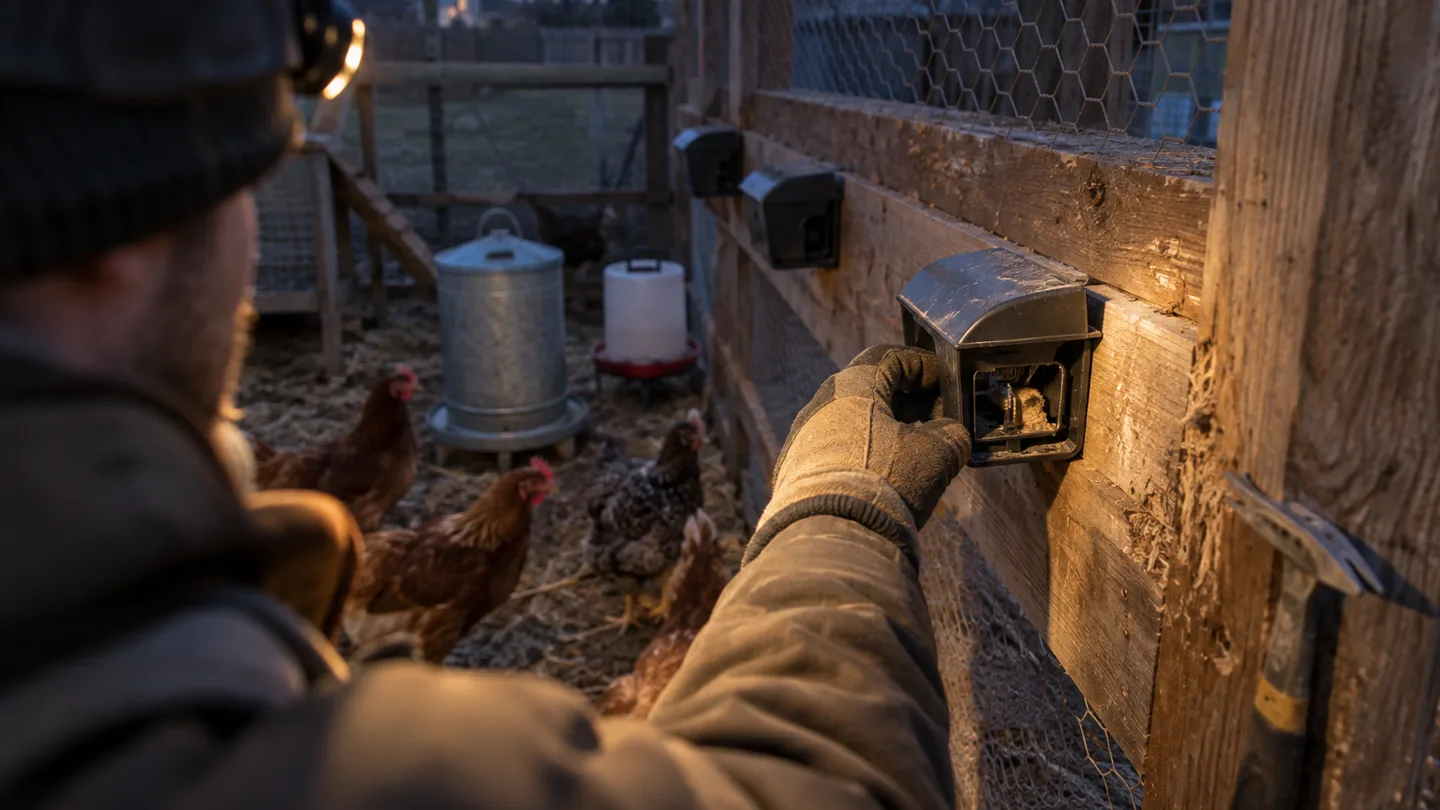
Use 2 to 4 enclosed, size-appropriate snap traps on active runways. Put them beside a wall, under a protected shelf, or inside a secured trap box where rats travel but hens, pets, and children cannot reach them. Keep the trigger side toward the wall when the trap design allows it.
If the rats are wary, leave the traps unset for 1 to 3 nights with a very small amount of bait. The goal is to make the object part of the route, not to leave a generous snack. Once fresh signs continue beside the trap, set it according to the manufacturer's instructions.
Check traps at least in the morning and evening. If fresh droppings appear along a different wall, move one trap to that route instead of adding traps at random. Open traps in the run are not acceptable, even if your hens seem uninterested today.
In my own four-hen setup, I once treated the problem as a trap problem. I set two traps but left the feeder in the run overnight. The next morning, the traps were untouched, the feed pan was scraped clean, and fresh droppings sat along the wall. I moved the feeder inside at dusk, cleaned the spill, and reset the traps. I don't treat a trap as the first move now. It is the second half of a food-and-route plan.
Rodenticide is not a shortcut around exclusion
Put zero loose rodenticide in the coop or run. If you are considering a product outside the birds' access, the product must be legal where you live, approved for that use on its label, and placed in a tamper-resistant station that hens, dogs, cats, and wildlife cannot reach.
Read the EPA rodenticide label guidance before making that decision. Do not improvise a dose, mix products, scatter pellets, or assume that a bait station fixes a hole in the wall. Poisoned bait or a carcass can still become accessible after the rat leaves the station.
My judgment for a small backyard flock is simple: fix food storage and exclusion first. If the route is still open, poison treats the visitor while leaving the invitation in place.
Clean contamination after the food source is gone
Move the hens to a clean holding area before you clean. Open doors or vents for airflow if doing so does not create another escape or predator route. Wet droppings and soiled bedding before lifting them. Avoid dry sweeping or vacuuming, which can push contaminated dust into the air.
Discard chewed feed, cracked eggs, and nest material that is heavily soiled. Bag the waste according to your local rules. Wear gloves, and wash your hands after removing bedding or handling contaminated surfaces.
Clean first, then use a disinfectant according to its label. Let the surfaces dry before the birds return. Do not rush the drying step; damp corners can turn a tidy-looking repair into another attractive place for pests and mold.
For a room-by-room routine, use how to clean a chicken coop as a checklist. You can also review CDC guidance on cleaning rodent droppings and urine before tackling a larger mess.
Inspect the coop for seven nights after cleaning. Old droppings can remain after the rats have moved on, so pair what you see with new gnawing, fresh tracks, trap activity, or a newly opened burrow.
Keep eggs and chicks behind the right barrier while rats are active
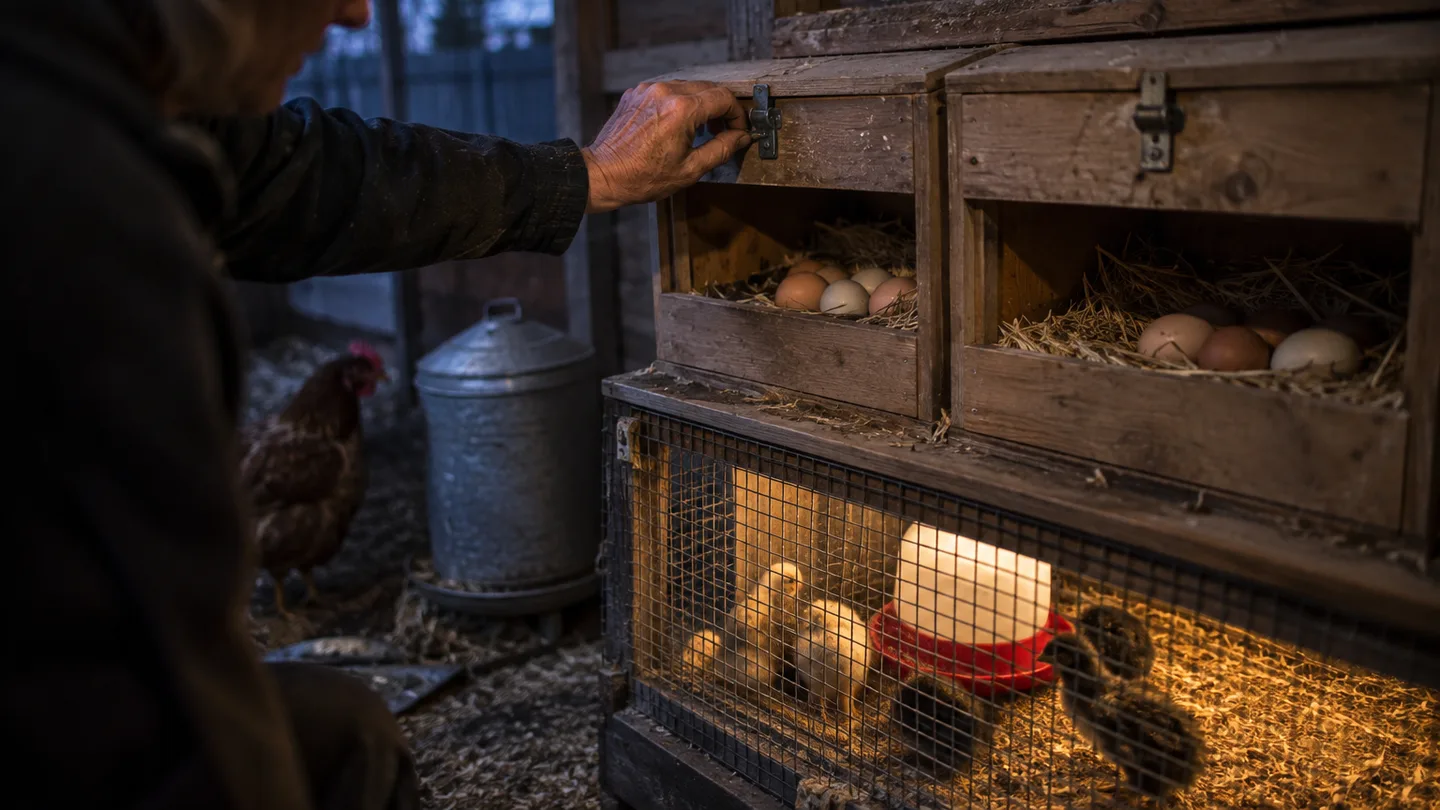
Rats change the rules around eggs and chicks. Collect eggs at least once a day. If eggs are being chewed or broken, collect them twice daily until the route is under control.
Use 1/4-inch mesh or rigid-sided protection around a brooder. Keep spare chick feed in a sealed container outside the brooder, and keep only the working feeder inside the protected area. A bulk bag beside the brooder creates an easy target.
Inspect every bird for punctures, bleeding, weakness, unusual hiding, or breathing trouble. A bite wound is not just a pest-control problem. Call a veterinarian for a bird with a wound, marked weakness, breathing difficulty, or a bird that stops eating or drinking. Do not try to solve a sick chick with a home dose copied from a different product.
Use a seven-day evidence check to decide whether the problem is shrinking
Make a simple seven-day log. Record the date, the location of fresh droppings, new gnaw marks, tracks in dust or damp soil, opened burrows, trap activity, and any daylight sighting. Marking the location matters because a rat may stop using one route after you close it and test another.
Fresh signs and daylight activity deserve more weight than old droppings. They tell you what is happening during the period you are watching. Droppings cannot provide a reliable rat count, so do not declare victory or defeat by trying to total them.
If signs do not decline after 3 to 7 nights of food exclusion and correctly placed traps, revisit the access points and travel routes. Do not respond by scattering random repellents around the run. The next useful question is usually where the rat is getting in, not which stronger-smelling product to add.
Know when a backyard fix has reached its limit
Call a pest professional when fresh signs continue after roughly 7 to 14 days of food removal, exclusion, and trapping. Escalate sooner if rats are entering a wall or foundation void that you cannot open safely, if wiring or structural material is being damaged, or if daytime sightings keep repeating.
A veterinarian is the right call for bite wounds, persistent bleeding, breathing trouble, marked weakness, or a hen that stops eating or drinking. Pest control protects the housing. It does not replace care for an injured bird.
Seven days of small checks keep a rat problem from rebuilding
Once the immediate problem is quiet, make prevention boring and repeatable. Secure or remove feed every evening. Check for spills daily. Inspect the 1/2-inch barrier, seams, door threshold, and ground edge weekly. Examine storage-bin lids, latches, feeder hinges, and worn plastic monthly.
Track the feed cost with this formula: daily grams × 30 ÷ 1,000 × local price per kilogram. Six hens eating a planning amount of 130 grams each would use about 23.4 kilograms in 30 days before adjustments for waste, forage, weather, or changes in appetite. Check current local prices rather than relying on an old example.
Feed left on the ground is not just a pest signal. It is part of your flock's real running cost. A sealed bin, a measured portion, and a quick evening sweep can cost less than repeatedly replacing wasted feed or repairing a chewed door.
This week, measure the largest gap with a ruler, move the feed into a rigid sealed container, and start a seven-night activity log. Once the rat route is closed, use chicken run predator protection to check the rest of the perimeter before the next visitor finds it.