How to Build a Chicken Coop: Plan for Airflow and Predators
Four hens fit the arithmetic neatly: a 4 × 4 ft coop gives each bird 4 sq ft indoors, and a 4 × 10 ft run gives each 10 sq ft outside. That’s a useful starting plan for standard-size hens, but the right build also depends on how long your birds stay confined, the weather they face, and whether the layout can keep air moving without leaving an easy way in for predators.
How to build a chicken coop for four hens—and scale it to 3–12
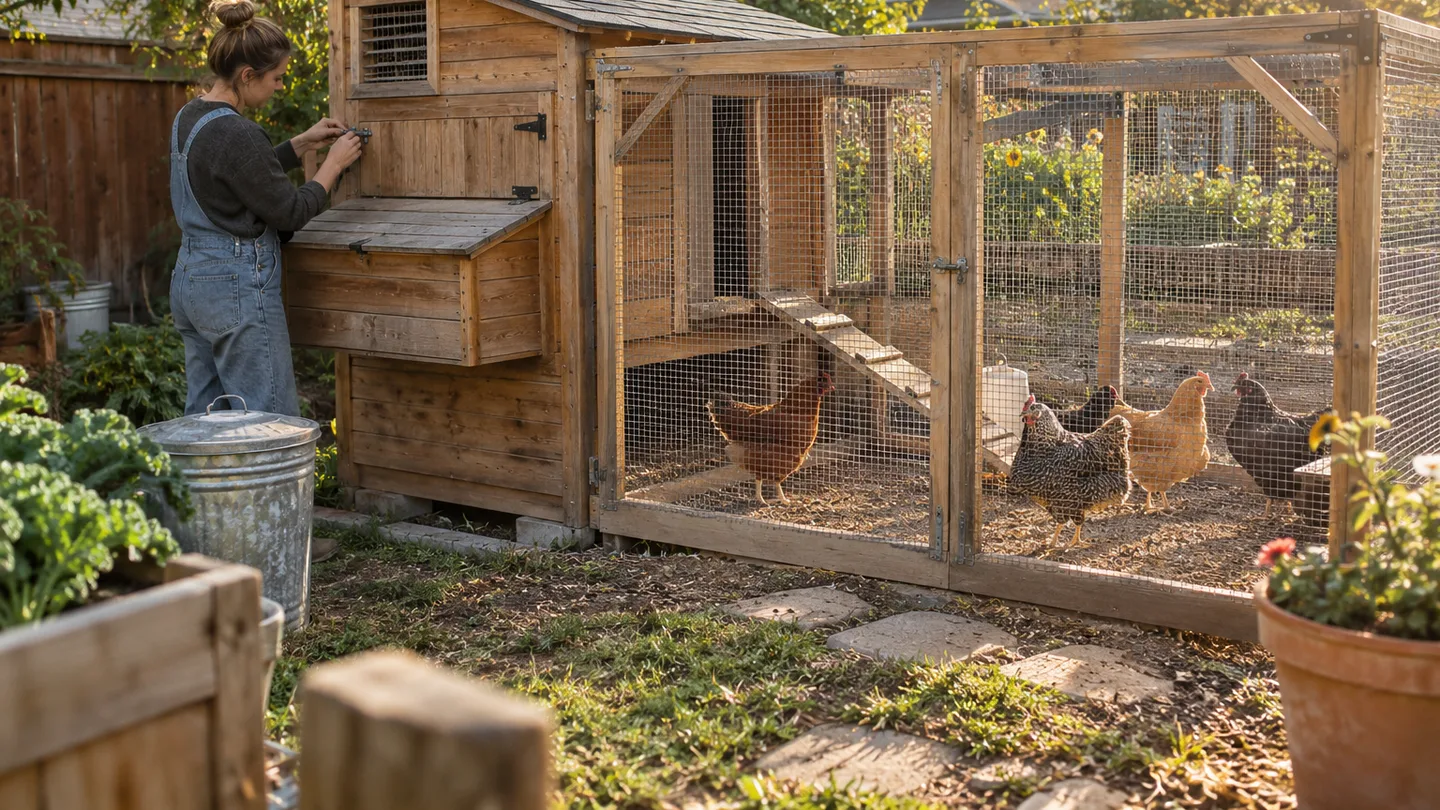
Start with the flock, not the lumber aisle. For a small backyard setup, I’d plan around 3–4 sq ft of indoor floor space and 8–10 sq ft of run space per standard-size hen. Those are working allowances, not a code requirement. If your birds will spend long stretches inside during bad weather, or you’re keeping larger-bodied breeds, plan toward the roomy end or beyond it.
For four hens, the example works out to 16 sq ft inside and 40 sq ft in the run. To scale it, multiply your flock size by the allowance: three hens need a planning range of 9–12 sq ft inside and 24–30 sq ft in the run; 12 hens need 36–48 sq ft inside and 96–120 sq ft outside. Treat those as clear usable areas. A feeder, nest boxes, and awkward corners don’t give birds more room to move.
Larger birds and a flock that spends most of the day in the run both argue for extra elbow room. My judgment: spend a little more effort on usable run space before adding decorative features. A cramped traffic lane around the feeder can make a generously sized footprint feel smaller in daily use.
Choose a site that stays dry and gives you room to work
Walk the yard after rain before you choose the spot. Avoid a low patch where water collects, and think about where roof runoff will go. A coop that sits in a puddle-prone corner can leave you carrying wet bedding out through mud. Pick a route that lets you reach the door with a bucket or bedding bag, and place the feeder and waterer where you can refill them without climbing over the run fence.
Use existing shade and wind shelter where they help, but don’t seal the building against weather. Rain protection belongs in the roof, overhangs, and a sheltered wall; fresh air still needs a path through high openings. Local wind direction and summer sun differ from yard to yard, so watch your own site for a day rather than copying a compass direction from a generic plan.
Before buying materials, ask your local zoning or building office about setbacks, structure rules, and backyard-livestock requirements. The municipality’s rules are the place to confirm whether your planned footprint needs approval. A garden shed can be converted if it has enough clear floor area, a secure run connection, high ventilation, predator-resistant openings, and a clean-out route you can actually use. An existing shed doesn’t solve those design jobs by itself.
If your shed is insulated, check that the insulation is protected from pecking and that it hasn’t led you to close off ventilation. Insulation may suit some climates and building designs, but it doesn’t replace fresh-air exchange. Ask a local extension office for climate-specific guidance if you’re unsure how your winters and humidity should affect the build.
Make the frame, floor, and roof shed water before you add fittings
For the 4 × 4 ft example, begin by leveling the base and squaring the floor frame. Build the wall frames on a flat surface, stand and brace them, then sheath the exterior and complete the roof before you install roosts or nest boxes. That order gives you a dry shell to work inside and makes it easier to see whether the doors and corners line up.
Make a takeoff before shopping: floor framing and floor material for a 16 sq ft footprint; wall framing and sheathing sized to your chosen height; roofing and underlayment; exterior fasteners; a door and hinges; vent covers; and hardware cloth for vulnerable openings. Add trim to protect exposed edges and a finish suitable for outdoor use. Exact board counts depend on wall height, roof shape, sheet sizes, and how you plan to handle offcuts, so draw the frame and calculate cuts before placing an order.
I prefer a durable floor that I can scrape and wipe during routine clean-out. A dirt floor is another design choice, but it changes how you manage dampness, digging access, and the floor perimeter. Whichever you choose, keep vulnerable edges out of persistent wet soil and plan how the wall-to-floor joint will be protected from gnawing or digging. For a cost estimate, price your own cut list at nearby suppliers and compare equivalent materials; lumber, roofing, and hardware prices vary by location and date, so a single total without those details would mislead you.
Keep the roof simple enough to inspect. Direct water away from the entrance and run, and avoid a roof edge that leaves an unprotected gap into the coop. Before fitting the interior, check that rain can’t track through the roof joint or run connection.
Size the high vents: a starting rule, not a one-size-fits-all answer
For a first sketch, allow about 1 sq ft of vent opening for every 10 sq ft of floor area. On the 16 sq ft example coop, that points to roughly 1.6 sq ft of opening area before you account for covers. I use that only as a design starting point: climate, flock size, wind exposure, and the shape of the openings can change what works. Screens and louvers also reduce the open area, so don’t measure only the outside frame and assume all of it passes air.
Put the main openings above roost height. That gives warm, moist air a route out without making the sleeping perch the direct path of a cold stream. High openings on opposing walls can encourage cross-flow; a high outlet paired with a lower inlet can also create a route through the space. In either arrangement, position and baffle the openings so air can move through the coop without blowing straight across resting birds.
A practical check is to hold a light strip of tissue at roost height on a breezy day. If it flutters hard where the birds would sleep, change the opening angle or add a simple baffle; if air seems stagnant, inspect whether the vent is blocked or undersized. My preferred test is at bird level, because a vent can feel breezy at the wall while the roost itself stays still—or the reverse. Recheck on a still, damp day as well as in wind.
Insulation is a climate and construction decision, not a substitute for ventilation. If you add it, keep it covered so birds can’t peck at it, and preserve the high air path. Damp bedding or condensation calls for a moisture and airflow check before you reach for more insulation.
Close the gaps predators can reach through, pry open, or climb over
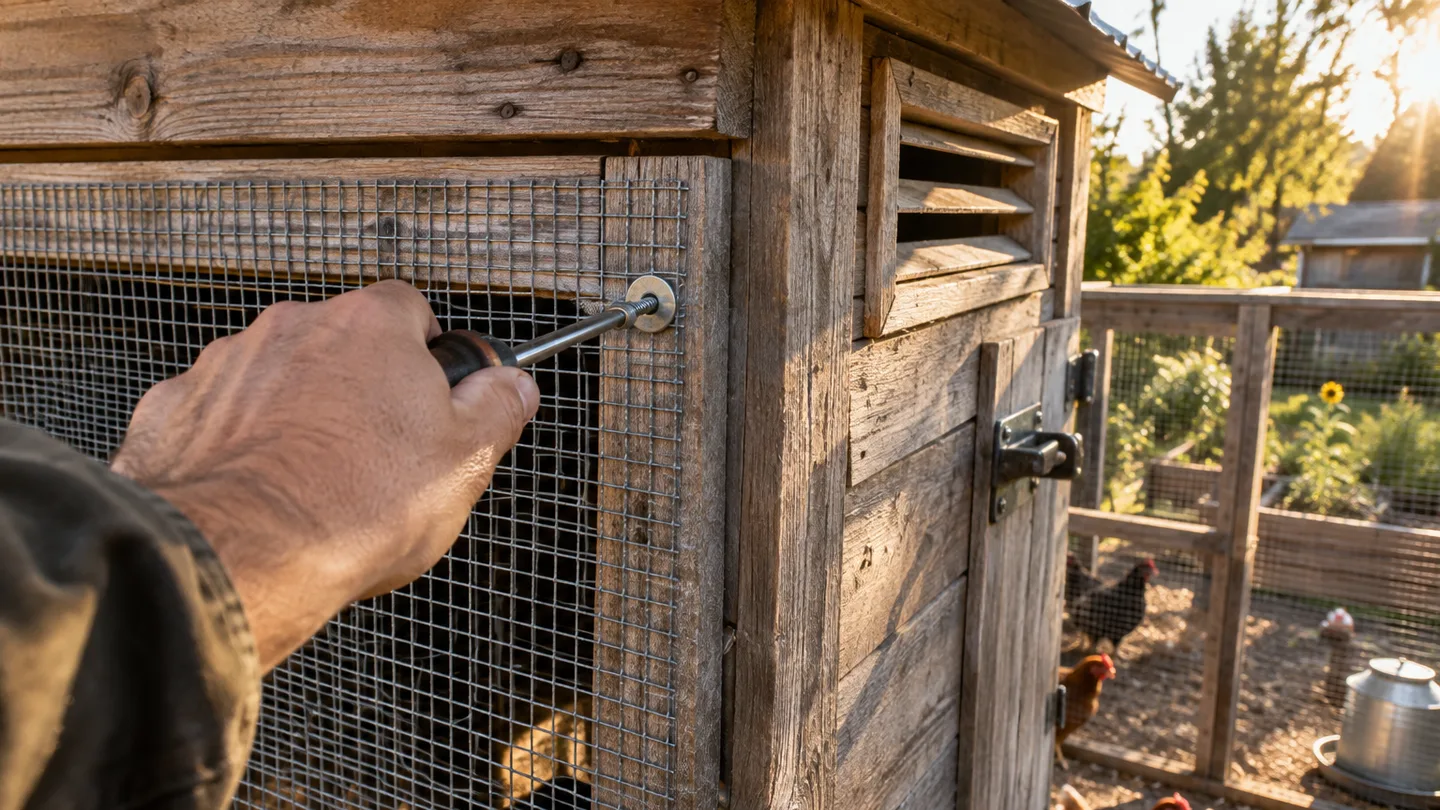
For openings a predator could reach, plan to cover the opening with 1/2-inch hardware cloth and fasten it to solid framing. Chicken wire can help keep chickens within a boundary, but I wouldn’t rely on it as the sole barrier for a coop opening: a flexible mesh edge or a weak attachment leaves a route that the mesh pattern alone can’t fix.
Use screws and washers or another fastening method that holds the mesh firmly against the frame; don’t leave a flap that can be pulled away. Cover windows, vent openings, and roof-edge gaps. A small opening beside a door matters as much as the broad panel beside it, so inspect the structure as one connected enclosure rather than checking only the largest wall.
Choose a latch that needs more than a casual lift or slide to release. Test it from outside with the door shut, then pull and push on the door to look for flex or a gap. If you can reach the latch through an opening, rethink its position or shield it. Hinges, latch, frame, mesh, and roof edge all need to meet without an uncovered seam.
One detail worth checking after the first few weeks is the mesh edge itself. Fasteners can loosen where a door or gate moves; if you find a lifted edge, refasten it to sound framing and check the neighboring section too. A secure-looking panel is only as dependable as its attachment at the corners.
Extend the run barrier 12–24 inches beyond the fence line
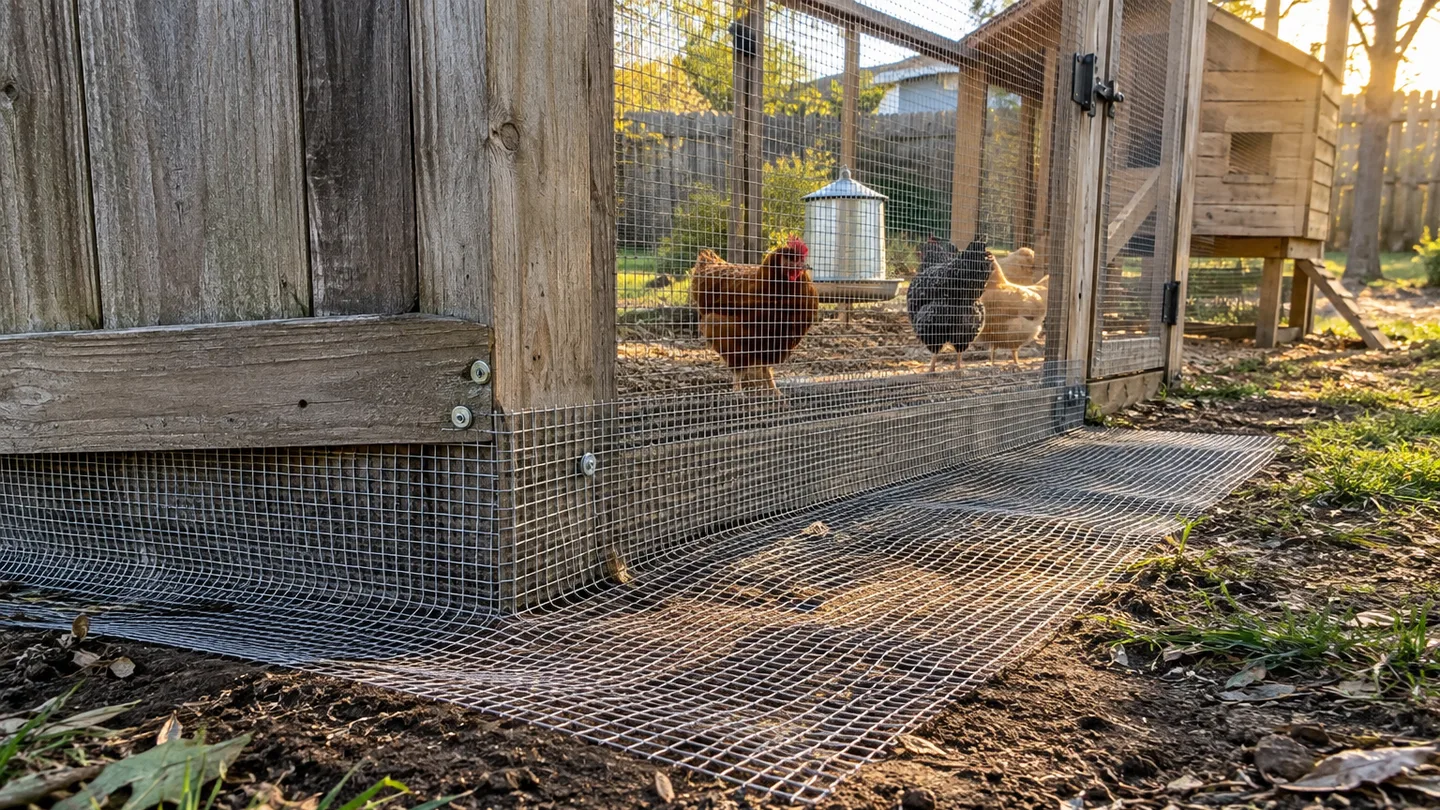
A horizontal hardware-cloth apron is a practical way to make the fence base harder to dig at. For a small run, plan an outward strip about 12–24 inches wide, secured around the perimeter and joined to the fence so there isn’t a loose seam at ground level. Cover and anchor it with soil, sod, or another suitable surface finish for your yard.
You can also bury a barrier vertically. That puts material below grade, but it means digging a trench and working around roots, rocks, and utilities. A surface apron avoids that trench; in return, it needs careful anchoring and may be more visible or vulnerable to disturbance in a frequently worked garden. Soil conditions, the predators in your area, and your own maintenance habits decide which is easier to keep intact. Neither arrangement makes the run impossible to breach.
Pay special attention to corners and the gate. Bring the apron continuously around each corner, and connect it to the gate threshold without leaving a narrow uncovered strip. At a gate that swings over the barrier, check that the cloth doesn’t snag or lift when the gate moves. Walk the full perimeter from outside and look for gaps where two pieces meet.
Fit roosts, nest boxes, and clean-out access around the flock
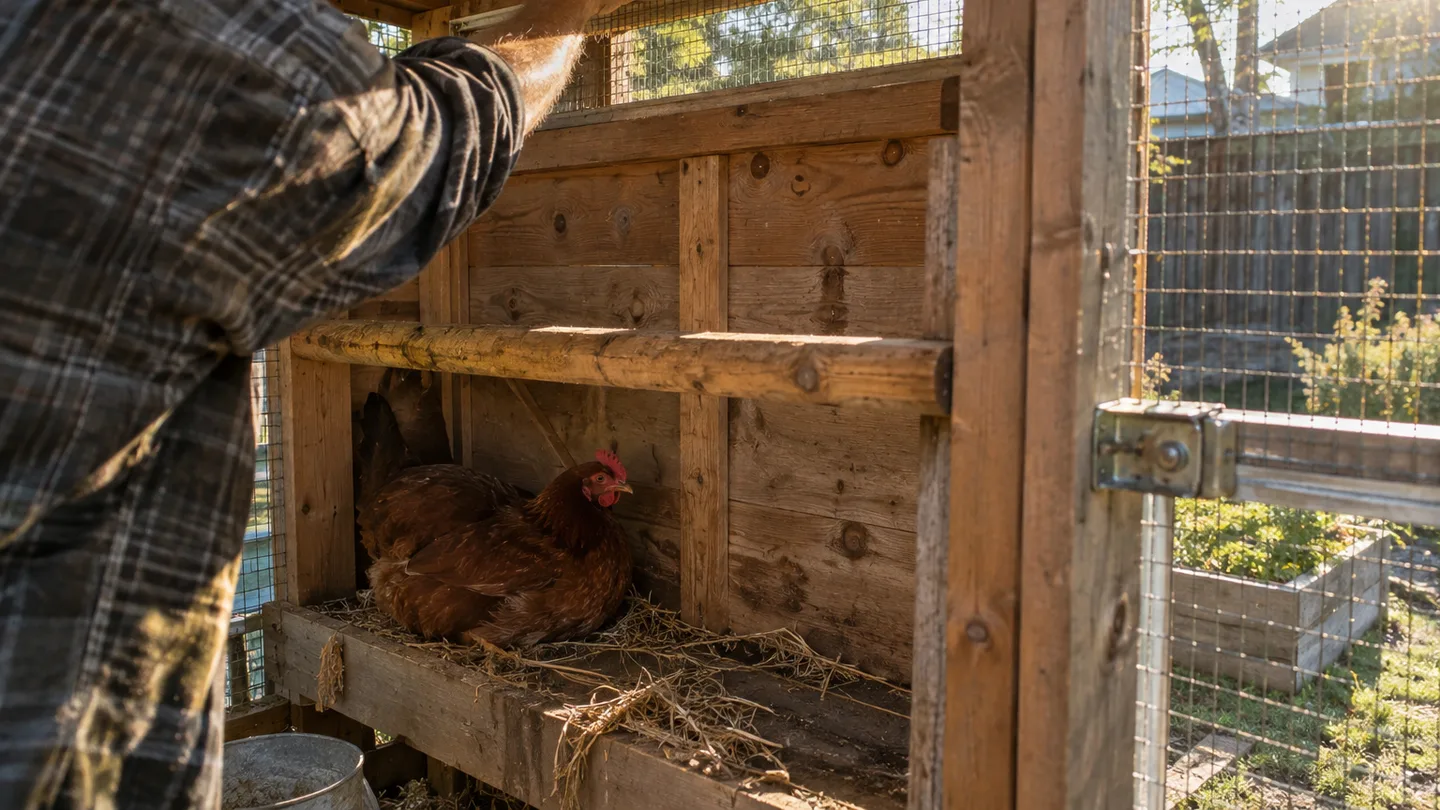
Allow about 8–10 inches of roost length per bird as a starting plan. Four hens would call for roughly 32–40 inches of perch space. Leave room for birds to settle without forcing the roost directly against a wall, and adjust if your flock’s size or behavior makes the perch feel crowded. If you’re planning the height, see the guide to how high should roosting bars be.
For nest space, begin with about one 12 × 12-inch box for every 3–4 hens. Put the roosts higher than the nest boxes so the boxes are less tempting as overnight sleeping spots, and leave a clear route for collecting eggs. Your birds may favor one box, so give yourself access to check each one rather than burying them behind a fixed panel.
Keep the clean-out route in the plan from the beginning. A door or removable panel should let you reach the floor with a scraper and carry out used bedding without dismantling fittings. Don’t place a roost, nest box, or feeder where it blocks a vent or prevents you from closing and latching the coop securely. For bedding choices and how they affect routine clean-out, see best bedding for chicken coop.
Check the empty coop in wind and rain before birds move in
Before your birds arrive, close every door and try every latch. Press gently on mesh panels, inspect the corners and roof edges, and trace the run barrier around the entire perimeter. After rain, look for water pooling at the base, wet bedding, drips at the roof joint, and runoff flowing toward the entrance. Fix the route water takes before you add bedding and birds.
Check airflow at roost height in more than one kind of weather. A stale smell, persistent condensation, or damp bedding is a reason to inspect ventilation, leaks, and water management—not simply to shut the vents. If you adjust an opening, repeat the tissue check where the birds sleep and confirm the latches and mesh are still secure.
My practical judgment is that the best-looking coop is the one you can keep dry, ventilated, and closed up on an ordinary busy day. This week, sketch your flock-sized floor and run, mark the high vents, the door swing, and the full predator barrier, then take that plan to your local office and lumber supplier before buying materials.
Frequently Asked Questions
Does a backyard chicken coop need insulation?
Explain that insulation depends on climate and construction; it does not replace ventilation, and poorly managed moisture can be a problem. Point readers to local climate-specific guidance.
Can you convert a garden shed into a chicken coop?
Yes, if the shed can be adapted with adequate floor and run space, high ventilation, secure predator barriers, and accessible clean-out. Suggest checking the same measurements and build details in the main guide.
Do you need a permit to build a chicken coop in your backyard?
Requirements vary by municipality, property rules, and sometimes structure size. Tell readers to check local zoning and building authorities before construction.